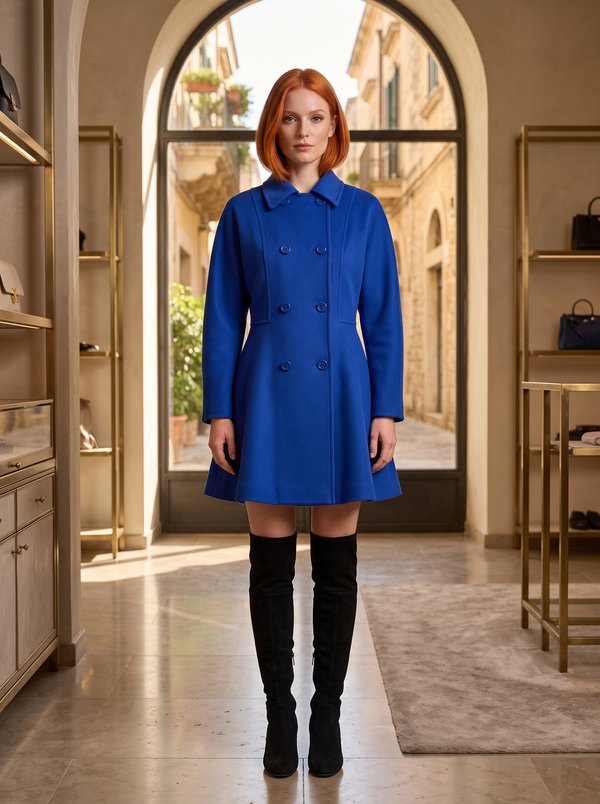
Double-Breasted Wool Blazer
A women's double-breasted jacket, hip length, with notched lapels, front and back princess seams, two-piece set-in sleeves and flap pockets with two welts on the side panels. Fully lined, with shoulder pads.
When To Wear
- With trousers or a straight skirt for the office in autumn, winter and spring.
- Over a knit top and jeans as an outer layer on cool days.
Key Design Features
Silhouette: Straight, shaped by bust darts, princess seams and side panels at the front, and by princess seams and shoulder darts at the back.
Length: Hip length.
Collar: Notched collar with lapels. The under collar is set into the neckline up to the notch and the upper collar into the facings; the collar seam allowances are stitched together between the neckline corners.
Front: Double-breasted, two buttons side by side. One buttonhole on each front; the button on the right front is backed by a flat button on the wrong side.
Sleeves: Two-piece set-in sleeves with sleeve head wadding; the drawing shows three small buttons at each sleeve hem.
Pockets: Double-welt pockets with flaps on the side panels, openings reinforced with interfacing. Pocket bags are cut from lining (lower welt side) and from main fabric (upper welt side).
Back: Centre back seam, shoulder darts and back princess seams.
Finishing: Armhole edges of the back and side panels stayed with interfacing strips; shoulder pads.
Lining: Full lining of body and sleeves, with an ease pleat; the lining is tacked to the shoulder pads at the top of the armholes and the jacket is turned through an opening left in a lining seam.
Level Of Difficulty
Advanced. Flap pockets with two welts, a notched collar and lapels sewn to the facings, two-piece sleeves, a bagged full lining.
Fabric Recommendations
Medium-weight fabrics with body that hold the lapel and pocket shape: wool suiting, wool flannel, tweed, wool blends.
Additional Supplies
- Lining fabric
- Fusible interfacing (fronts, front facings, collar, pocket flaps, pocket welts, stay strips for pocket openings and armholes)
- 2 buttons for the front and 1 flat button for the inside
- Small buttons for the sleeves (shown on the drawing)
- Shoulder pads
- Sleeve head wadding
Cutter's Must
- From main fabric:
- Center Front – 2 pieces
- Side – 2 pieces
- Back – 2 pieces
- Collar – 2 pieces
- Upper Sleeve – 2 pieces
- Lower Sleeve – 2 pieces
- Center Front Facing – 2 pieces
- Pocket Flap – 4 pieces
- Pocket Facing – 4 pieces
- From fusible interfacing:
- Center Front Facing – 2 pieces
- Center Front – 2 pieces
- Collar – 1 piece
- Pocket Flap – 2 pieces
- Pocket Facing – 4 pieces
- From lining:
- Center Front – 2 pieces
- Side – 2 pieces
- Back – 2 pieces
- Upper Sleeve – 2 pieces
- Lower Sleeve – 2 pieces
- Pocket Bag – 4 pieces
Sewing Instructions
- Reinforce the pocket openings on the side panels and the armhole edges of the back and side panels with strips of fusible interfacing.
- Stitch the bust darts and the front princess seams.
- Flap pockets with two welts: Place the pocket facings (welts) on the front, right sides together, and stitch them along the stitching lines. Cut the garment between the stitching lines, stopping short of the ends, then clip diagonally to the ends of the stitching without cutting the pocket facings. Press the seam allowances open. Turn the pocket facings to the wrong side, wrap them around the cut edges and form an even frame. From the wrong side, stitch the pocket facings along the attachment seam. Turn the small triangles at the ends of the opening to the wrong side and stitch them to the pocket facings, from the end of one stitching line to the end of the other.
- Place an interfaced and a non-interfaced pocket flap right sides together and stitch around the outer edges. Turn the flap right side out and press. From the right side, insert the flap into the pocket opening, pin it under the upper pocket facing and stitch it to the facing from the wrong side.
- Stitch the lining pocket bag to the lower pocket facing and the main fabric pocket bag to the upper pocket facing. Trim the pocket bags to the same size and stitch them together.
- Stitch the center back seam and the shoulder darts, the back princess seams and shoulder seams, and the sleeve seams.
- Hem the sleeves and set them in. Sew in the sleeve head wadding and the shoulder pads.
- Lining: Press the ease pleat, stitch the darts, princess seams and sleeve seams, leaving a short section of one seam open for turning the jacket.
- Stitch the center front facings to the lining fronts. Stitch the shoulder seams. Set in the lining sleeves.
- Stitch the under collar into the jacket neckline up to the notch.
- Stitch the upper collar to the facings and lining, clipping the seam allowances of the fronts and facings at the corners up to the seam. Press the seam allowances open. Place the upper collar and facings on the jacket, right sides together. Stitch the front edges, lapels and collar up to the notch.
- Stitch the lower edges of the facings and lining to the jacket hem allowance. Turn the jacket right side out. From the wrong side, stitch together the collar seam allowances between the neckline corners.
- Tack the lining to the shoulder pads at the top of the armhole. Close the opening in the lining seam. Turn under the hem allowance of the lining sleeves and stitch it to the sleeve hem.
- Make one buttonhole on each front. Sew on the buttons. When sewing the button on the right front, catch a flat button on the wrong side.