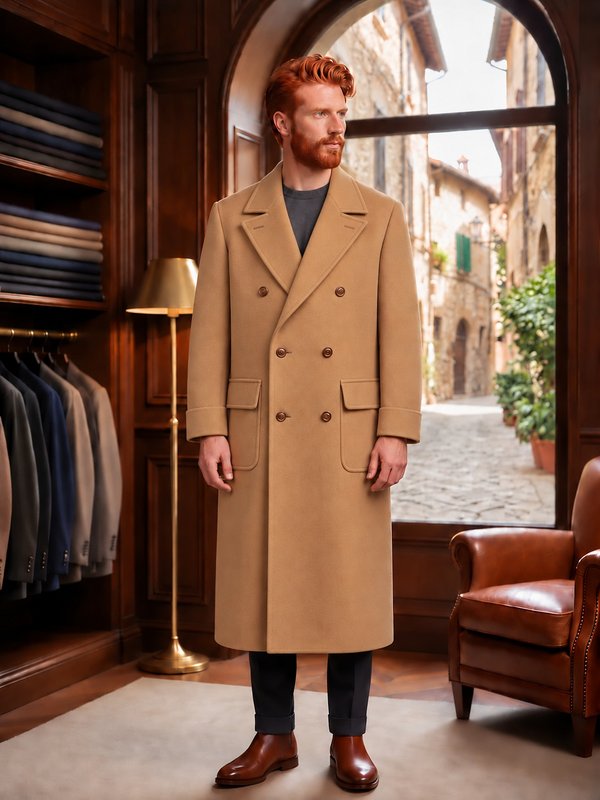
Classic Single-Breasted Jacket with Chest Welt Pocket, Hip Double-Welt Pockets with Flaps & Double Back Vents
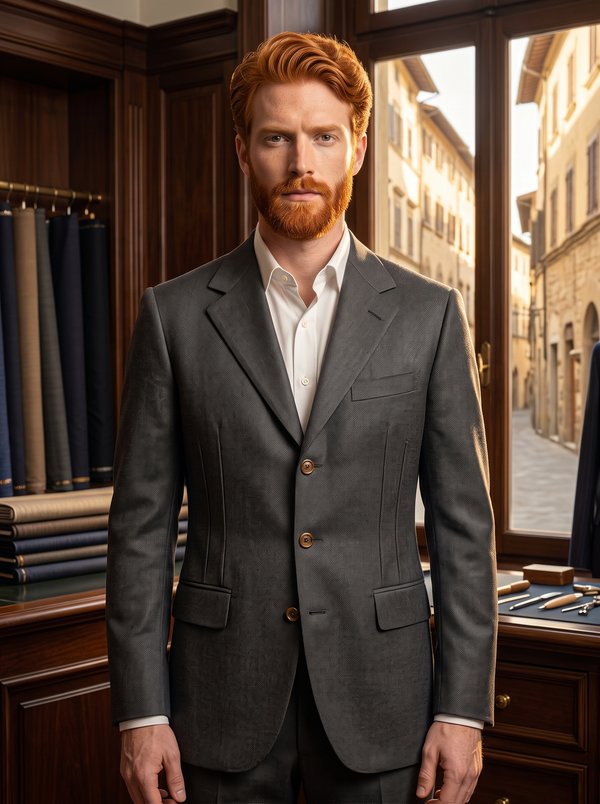
A men's hip-length single-breasted jacket with notched lapels, a three-button front with rounded front corners, flapped double-welt hip pockets, a chest welt pocket and two back vents. Canvassed fronts and a full lining.
When To Wear
- As a suit jacket with matching trousers for business wear.
- As a separate jacket with flannels, chinos or jeans and a shirt, in autumn, winter and spring.
Key Design Features
Silhouette: Shaped by front darts that run into the hip pockets and by side panels between front and back; padded shoulders.
Length: Hip length, covering the seat.
Collar: Notched lapels with a buttonhole in the left lapel. The upper collar has a separate stand; the under collar is set into the neckline.
Sleeves: Two-piece set-in sleeves with eased caps and optional wadding sleeve heads; vents closed with four buttons, buttonholes worked but not cut.
Front: Single-breasted, three buttons, buttonholes on the left front; separate front facings.
Pockets: Single-welt chest pocket on the left front; double-welt hip pockets with lined flaps on both fronts.
Back: Centre back seam; two vents at the seams between back and side panels.
Finishing: Canvas pad-stitched to the upper fronts; fusible interfacing on the fronts, facings, collars, stand, flaps, chest welt and the hem and vent allowances; hems blindstitched by hand.
Lining: Full lining, 2 cm shorter than the jacket, with a 2 cm ease pleat at the centre back and a jump pleat at the hem; the jacket is turned through an opening in a sleeve lining seam.
Level Of Difficulty
Advanced. Hand pad-stitched canvas, shrinking the sleeve with the iron, flapped double-welt pockets, mitred sleeve vents, lined back vents and a bagged lining.
Fabric Recommendations
Wool or wool-blend suiting. Checks can be used if the pieces are laid out so the checks match at the seams.
Additional Supplies
- Lining fabric in a matching colour
- Fusible interfacing, 1.20 m, 140 cm wide
- Canvas interfacing (bortovka), 50 cm, 90 cm wide
- Polyester wadding, 10 cm, 90 cm wide, for the sleeve heads
- 3 buttons, 20 mm
- 8 buttons, 14 mm
- Shoulder pads
Cutter’s Must
From Main Fabric:
- Back – 2 pieces
- Front – 2 pieces
- Side – 2 pieces
- Upper Sleeve – 2 pieces
- Lower Sleeve – 2 pieces
- Upper Collar – 1 piece
- Stand Collar (for Upper Collar only) – 1 piece
- Lower Collar (with integrated stand) – 1 piece
- Center Front Facing – 2 pieces
- Pocket Flap – 2 pieces
- Pocket Welt (marked on pattern as “Pocket Off-Set Welt”) – 1 piece
- Pocket Welt Facing – cut 4 rectangles (18.5 x 4 cm)
- Pocket Underlay – rectangle 16 × 6 cm – 1 piece (chest pocket; trim to the width of the pocket bag)
From Lining Fabric:
Use main pattern pieces with the following modifications:
- Back Lining – use Back pattern, add 2 cm pleat at center back, exclude vent extensions; cut 2.
- Front Lining – use Front pattern excluding center front facing area; cut 2.
- Upper Sleeve – use pattern excluding vent extension; cut 2.
- Lower Sleeve – use pattern excluding vent extension; cut 2.
- Pocket Flap – cut 2.
- Pocket Bag (for Chest Pocket) – cut 2.
- Pocket Bag – 4 rectangles (18.5 × 20 cm).
- Shorten both jacket and sleeve linings by 2 cm at hem.
From Fusible Interfacing:
- Front – 2 pieces
- Center Front Facing – 2 pieces
- Upper Collar - 1 piece
- Stand Collar - 1 piece
- Lower Collar (with integrated stand) – 1 piece
- Pocket Flap – 2 pieces
- Chest Pocket Welt - 1 piece
- Hem allowances of Fronts, Back, Sleeves and Vents.
Important Information
Before cutting your fabric:
- Print and lay out pattern pieces to determine yardage.
- Check mirrored pieces, notches, and grainlines.
- For patterned fabrics, align carefully for symmetry.
Assembly Instructions
Preparation – Fuse Interfacing
From the wrong side, apply fusible interfacing to Fronts, Center Front Facings, Upper Collar, Stand Collar, Pocket Flaps, Chest Pocket Welt, hem allowances of body and sleeves, and vent extensions.
Body Shaping
- Slash pocket opening on the front, stitch dart, cut along fold, and press open.
- Baste along pocket opening edges.
Pocket Flaps
- With right sides together, stitch each Pocket Flap to its lining.
- Turn right side out and press.
Chest Welt Pocket
On the Left Front, construct a single-welt chest pocket:
- Fold welt lengthwise, right sides together. Stitch short ends, trim corners, turn, and press.
- Place the pocket underlay wrong side down on the right side of one lining pocket bag, aligning the upper raw edges; turn under its lower edge and edgestitch; baste the remaining edges.
- Place welt face down along pocket marking.
- Layer one lining pocket bag over welt, and the second lining pocket bag (with the pocket underlay) above, facing upward.
- Stitch 5 mm on each side of marking.
- Slash between stitching, clip diagonally to corners, turn to inside.
- Zigzag or hand-stitch welt’s free edge to lining pocket bag.
- Align pocket bags, stitch around contour.
- From right side, secure welt ends to garment.
Front Panel Seams
Stitch front panel seam; press allowances open.
Hip Pockets
Construct double-welt pockets with flaps:
- Press welts lengthwise, wrong sides together.
- Pin upper and lower welts to Front along markings.
- Place one lining pocket bag on lower welt; place the second lining pocket bag on upper welt with flap inserted between upper welt and bag (flap turned upward).
- Stitch 5 mm from each side of marking.
- Cut opening through center, clip to corners.
- Turn pocket bags inside, roll welts to form 1 cm lips, press.
- Press flap down over opening.
- Zigzag welt edges to pocket bags.
- Align and stitch pocket bags together.
- From wrong side, secure welt ends to small fabric triangles.
Body Assembly
- Stitch Backs together at center seam.
- Join Shoulder Seams.
- Attach Sides to Backs up to vents; press allowances open.
Collar & Facings
- Stitch Stand Collar to Upper Collar; press open.
- Stitch Lower Collar (with integrated stand) to neckline, right sides together; clip curves, press allowances down.
- Stitch Upper Collar + Stand Collar to Center Front Facings; press seams open.
- Place Center Front Facing + Collar unit right sides together with garment; align edges and stitch around lapels and collar.
- Trim corners, turn right side out, press.
- Slipstitch inner neckline edge of Stand Collar to cover neckline seam if needed.
Sleeves – Two-Piece with Vent
- Stitch Upper and Lower Sleeve together to vent notch, easing as necessary; press open.
- Turn sleeve right side out.
- Fold vent and hem allowances to right side, stitch diagonal across vent corner for clean miter, trim to 1 cm, press open.
- Turn allowances inside, secure with cross-stitch, form vent overlap.
Sleeve Cap
- Ease-stitch between notches, pull threads to fit armhole.
- Steam-shrink fullness.
- Stitch sleeve seam, press open.
- Set sleeves into armholes, sewing from sleeve side.
- Fold padding (if used) and hand-stitch to sleeve caps.
Vents & Hems
- Fold back vent facing to right side; stitch along hem foldline.
- Turn right side out, slipstitch invisibly along edge.
- Fold hem allowance of side panel to right side; stitch along vent facing edge.
- Turn right side out, slipstitch invisibly.
- Lay vents toward back; secure at top with a short diagonal tack.
Shoulder Pads
Sew in shoulder pads.
Lining
- Form movement pleat at center back; secure below neckline and a few centimeters above hem.
- Assemble lining same as main garment, leaving 20 cm opening in one sleeve seam.
- Insert lining into garment, right sides together, aligning center back and shoulders.
- Stitch lining to facings and neckline edges.
- Turn upper collar edge under; press.
- Place upper and lower collars wrong sides together; hand-stitch lower collar to upper collar and back neckline with loose zigzag.
- Form jump pleat along hem; attach lining to hem allowance, stitching to right vent fold and left vent facing edge (make a small horizontal snip at base of left back vent in lining before attaching).
- Turn right side out through sleeve opening; close opening neatly.
Finishing
- Work buttonholes on left front and lapel as marked; attach buttons.
- Work non-cut decorative buttonholes on sleeves; secure vents with buttons.