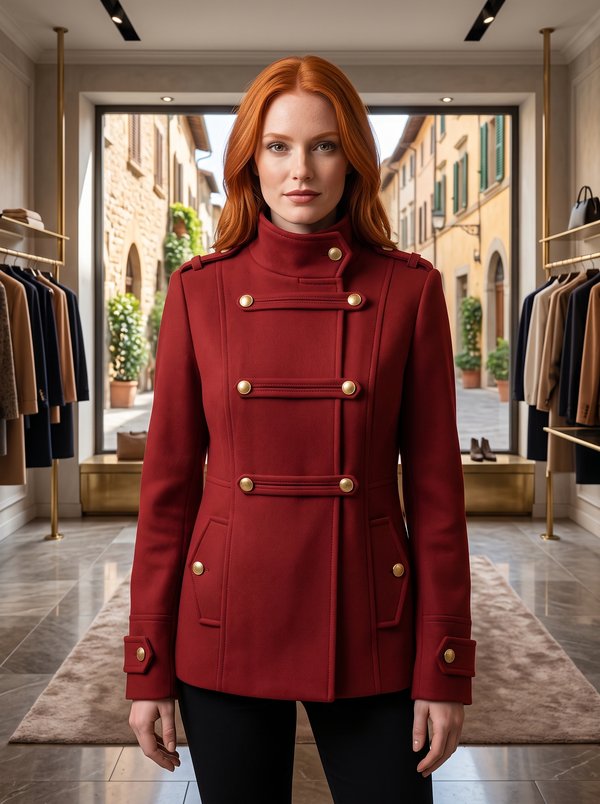
Double-breasted Notched Lapel Short Coat
A hip-length women's coat with princess seams, wide notched lapels, a double-breasted eight-button front, lined patch pockets with buttoned flaps and two-piece sleeves with buttoned vents. Fully lined, with shoulder pads.
When To Wear
- Autumn and spring, over trousers, jeans or knee-length skirts.
- Over knitwear on cool days, as a shorter alternative to a full-length coat.
Key Design Features
Silhouette: Semi-fitted, shaped by princess seams at the front and back.
Length: Hip length; 4 cm hem allowance, interfaced.
Collar: Wide notched collar and lapels; the lower collar is set into the coat neckline and the upper collar into the facings. Front edge seams understitched 0.2 cm from the seam, onto the facing in the buttoning area and onto the front at the lapels.
Front: Double-breasted, eight buttons in four pairs, buttonholes on the right front, with an inner button and buttonhole at the waist holding the underlap. Separate front facings; fronts fully interfaced.
Sleeves: Two-piece set-in sleeves with a sleeve vent trimmed with small decorative buttons; 4 cm hem allowance, interfaced; sleeve heads.
Pockets: Lined patch pockets on the fronts, each with a lined, interfaced flap sewn 1.5 cm above the pocket and topstitched 0.5 cm from the seam; a small button on each flap.
Back: Centre back seam and princess seams; back neck facing.
Lining: Full lining of the body and sleeves, bagged out through an opening in the sleeve lining seam.
Level Of Difficulty
Advanced. Coat tailoring: notched collar and lapels with separate upper and lower collars, interfaced fronts and hems, two-piece sleeves with shoulder pads and sleeve heads, flapped patch pockets and a bagged full lining.
Fabric Recommendations
Coating fabrics from natural or blended fibres.
Additional Supplies
- Lining fabric
- Fusible interfacing (fronts, side fronts, front facings, back neck facing, upper collar, flaps, hem allowances)
- 8 large buttons
- 10 small buttons
- 1 inner button
- Shoulder pads
- Sleeve heads
Cutter's Must
- From main fabric:
- Center Back – 2 pieces
- Side Back – 2 pieces
- Side Front – 2 pieces
- Center Front – 2 pieces
- Center Front Facing – 2 pieces
- Back Neckline Facing – 1 piece
- Lower Collar – 1 piece
- Upper Collar – 1 piece
- Pocket – 2 pieces
- Flap – 4 pieces
- Upper Sleeve – 2 pieces
- Lower Sleeve – 2 pieces
- From lining fabric:
- Center Back – 2 pieces
- Side Back – 2 pieces
- Side Front – 2 pieces
- Center Front – 2 pieces
- Upper Sleeve – 2 pieces
- Lower Sleeve – 2 pieces
- Pocket – 2 pieces
- Flap – 2 pieces
Attention: The center back and center front pieces are cut by subtracting the width of the back neckline facing and center front facing respectively.
- From fusible interfacing:
- Center Front – 2 pieces
- Side Front – 2 pieces
- Center Front Facing – 2 pieces
- Back Neckline Facing – 1 piece
- Upper Collar – 1 piece
- Flap – 2 pieces
Sewing Instructions
- Fuse the corresponding pieces with fusible interfacing, as well as the hem allowances of the garment and sleeves.
- Place the flap with the flap lining right sides together and stitch along the side and shaped edges. Trim the corner seam allowances, clip at curves. Turn the flap right side out, smooth, and press. Overlock the raw edge of the flap.
- Place the pocket with the pocket lining right sides together and stitch around the perimeter, leaving an opening for turning. Trim the corner seam allowances, turn the pocket right side out, smooth, and press. Slipstitch the turning opening closed.
- Place the upper collar with the lower collar and stitch along the ends and outer edge. Trim seam allowances at corners, clip at the notch. Turn the collar right side out, smooth, and press.
- Place the center front facing on the right side of the front, right sides together, pin, and stitch along the front edge, working from the hem upwards to the notch marking the end of the collar attachment. Stitch the lower edges of the facings to the front strictly along the marked hemline. Trim the seam allowances at the upper and lower corners, clip at the notch. Understitch the front edge seam allowances 0.2 cm from the seam: in the buttoning area onto the facing, in the lapel area onto the front. Turn the front edges right side out and smooth the seams.
- Stitch and press open the center back seam. Stitch and press open the princess seams of the back and front. Stitch and press open the shoulder and side seams.
- Mark the pocket placement. Topstitch the pocket in place along the marking. Measure 1.5 cm down from the upper edge of the pocket and mark the flap placement. Place the flap on the marking and stitch. Turn the flap down and topstitch 0.5 cm from the stitching seam.
- Stitch the back neckline facing to the center front facings at the shoulders and press open. Stitch the lower collar into the coat neckline, and the upper collar into the neckline edge of the back neckline facing and center front facings.
- Stitch and press open the elbow seam of the sleeve. Press the sleeve hem. Stitch and press open the front seam of the sleeve.
- Insert the sleeves into the armholes according to the notches. Insert shoulder pads and sleeve heads.
- On the lining fabric pieces, stitch the seams and insert the sleeves, leaving an opening in the front right sleeve seam.
- Stitch the lining to the inner edges of the center front facings and the back neckline facing. Press open the seam allowances of the collar insertion seams and secure close to the seams.
- Stitch the lining to the hem of the coat and sleeves. Turn the coat right side out through the opening in the sleeve lining. Stitch the opening closed.
- Make buttonholes on the right front and sew the buttons on the left front. Sew decorative buttons on the right front and on the sleeve vents. Make an inner buttonhole on the left front at the waist and sew a matching button on the inside of the right front.