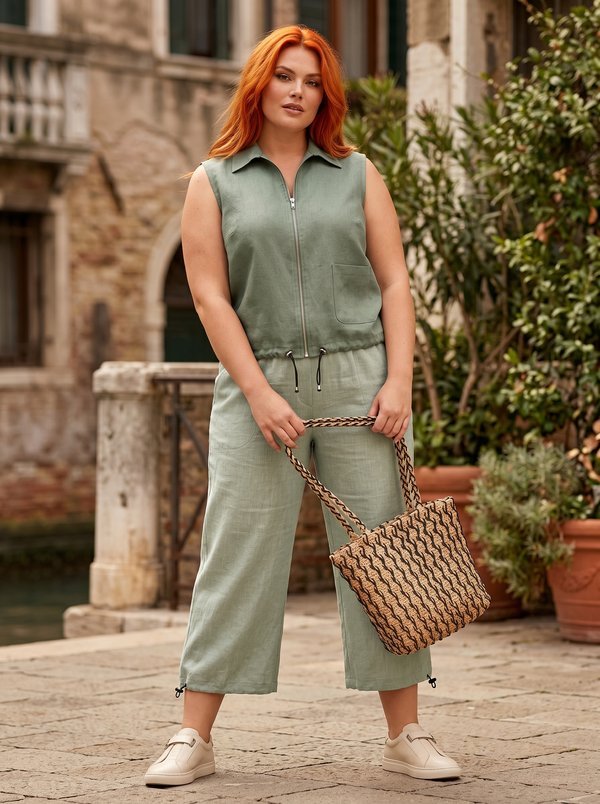
Straight Leg Cargo Trousers with Elastic Sides and Back
Cropped women's cargo trousers that end below the knee, with curved topstitched seams down the front and back legs, flap patch pockets at the sides, slanted front pockets, a zip fly and a waistband elasticated at the sides and back.
When To Wear
- In summer with T-shirts, shirts and flat shoes or trainers.
- For walks, travel and weekends.
Key Design Features
Silhouette: Straight legs.
Length: Cropped, below the knee.
Waist: Interfaced fold-over waistband, flat at the front, with elastic stitched on vertically at the sides and back so the fabric gathers there. Four belt loops.
Closure: Zip fly with a fly shield; one button and buttonhole on the waistband.
Front: Each front is cut in three parts: a centre front, a side front that forms the back of the pocket, and a side panel joined by a curved seam running from the hip to the hem, topstitched 0.5 cm from the seam.
Pockets: Slanted front pockets with lining-fabric bags, topstitched 0.5 cm from the edge. Two patch pockets at the sides of the legs, each with an interfaced flap topstitched 0.5 cm from the edge.
Back: Darts at the waist and a curved, topstitched seam on each leg matching the front.
Finishing: Seat seam stitched twice; 2 cm hem, pressed up and topstitched.
Level Of Difficulty
Intermediate. A zip fly with a fly shield, slanted pockets, flap patch pockets, topstitched curved seams and a part-elasticated waistband with belt loops.
Fabric Recommendations
Natural-fibre fabrics with added elastane.
Additional Supplies
- Lining fabric (pocket bags)
- Fusible interfacing (waistband, fly shield, flaps)
- Zip for the fly
- 1 button
- Elastic tape
Cutting Plan
- From main fabric:
- 1. Front cut-out side – 2 pieces
- 2. Front center – 2 pieces
- 3. Front side – 2 pieces
- 4. Fly shield – 1 piece
- 5. Patch pocket – 2 pieces
- 6. Flap – 4 pieces
- 7. Back center – 2 pieces
- 8. Back side – 2 pieces
- 9. Waistband – 1 piece
- 10. Belt loop – 8 pieces
- From lining fabric:
- 1. Pocket lining – 2 pieces
Sewing Instructions
- Fuse the waistband, flap, and fly shield.
- Place the pocket lining onto the front center of the trousers, right sides together, and stitch around the pocket opening. Fold the lining to the wrong side. Topstitch along the pocket opening 0.5 cm from the edge. Align the front center with the marking on the front side, which defines the pocket opening. Secure the front side to the front center of the trousers along the upper and side edges with a 1 cm seam. Stitch and overlock the pocket lining.
- Mark and stitch the darts on the back trouser panels. Press the darts towards the center back.
- Stitch and overlock the princess seam on the front trouser, press the seam towards the center front, and topstitch 0.5 cm from the seam.
- Stitch and overlock the princess seam on the back trouser, press the seam towards the center back, and topstitch 0.5 cm from the seam.
- Place the flap pieces right sides together and stitch around. Trim seam allowances at the flap corners and turn right side out. Topstitch along the outer contour of the flaps 0.5 cm from the edge and overlock the upper edge of the flap.
- Overlock the side edges of the trousers. Stitch and press open the side seams of the trousers.
- Overlock the outer contour of the pocket and press it according to the pattern piece. Topstitch the upper edge to the pocket, mark the pocket placement, and topstitch it along the contour 0.2 cm from the pocket edge. Place the flap at the marking and topstitch it. Turn the flap to the right side and topstitch 0.5 cm from the seam.
- Overlock the inseam, front, crotch, and bottom edges of the trousers. Stitch and press open the inseams. Stitch the front edge and crotch edge up to the notch for the zipper. Stitch a second line along the seat seam next to the front and crotch seam.
- Press the integrated zipper facings to the wrong side. Attach the zipper under the edge of the zipper allowance (left side) close to the edge. Attach the free tape of the zipper to the right, aligning it with the integrated facing. Overlock the side edges of the fly shield. Fold the fly shield in half lengthwise and stitch the short bottom edge. Topstitch the integrated zipper facing onto the fly shield on the left trouser. Topstitch the right edge of the opening, catching the facing.
- Fold the belt loop pieces and stitch around the contour, leaving the upper edge free. Turn right side out and press the belt loops, straightening the seams.
- Press the waistband in half lengthwise, wrong sides together, and overlock the lower inner edge of the waistband.
- Attach the waistband to the upper edge of the trousers. Stitch the ends of the waistband, trim seam allowances at the corners, and turn right side out. Cut elastic tape and topstitch it vertically onto the waistband. Topstitch the lower overlocked edge of the waistband into the attachment seam and press the waistband into its finished shape. Topstitch the belt loops to the upper edge of the waistband. Secure the belt loops to the trousers.
- Press the hem allowance to the wrong side and topstitch.
- Make a buttonhole on the right side of the waistband and sew a button on the left side.