Collared Belted Jacket with Epaulettes
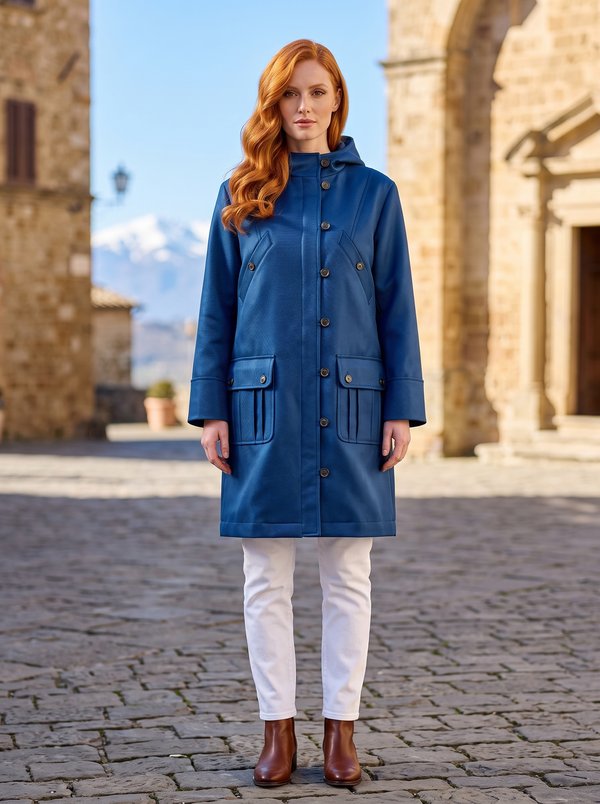
A hip-length women's jacket with a shirt collar on a stand, a centre front button closure, vertical zipped welt pockets on the chest and flap patch pockets below the waist. A self-fabric belt with a buckle runs through loops at the side seams, and buttoned epaulettes sit on the shoulders.
When To Wear
- In spring and autumn as a light outer layer: it is made in raincoat fabric and is not lined.
- Over shirts and knitwear with trousers, jeans or straight skirts.
Key Design Features
Silhouette: Straight, semi-fitted body drawn in at the waist by the belt.
Length: Hip length, hem turned up 3 cm and topstitched.
Collar: Shirt collar with rounded ends, set on a separate collar stand and topstitched.
Closure: Centre front buttons and buttonholes, with separate front facings tacked to the shoulder seams.
Sleeves: Long, one-piece set-in sleeves with eased caps, finished with folded band cuffs topstitched onto the sleeve.
Pockets: Two vertical double-welt chest pockets closed with zips, with pocket bags in self fabric and lining; two patch pockets below the waist, topstitched 0.2 cm from the edge, with stitched-on flaps.
Back: Centre back seam.
Waist: Self-fabric belt topstitched 0.5 cm from the edge, with a buckle; belt loops stitched over the side seams at the waistline.
Finishing: Lined epaulettes (shoulder straps) topstitched around the edge, caught into the armhole seam and fastened with a button each.
Level Of Difficulty
Intermediate. Zipped welt pockets, a two-part shirt collar, flap patch pockets, faced front edges, set-in sleeves with cuffs and buttonholes.
Fabric Recommendations
Raincoat fabric.
Additional Supplies
- Lining fabric (small chest pocket bags)
- Fusible interfacing (front facings, pocket flaps, epaulettes, cuffs) and stay tape for the chest pocket openings
- 7 buttons
- Belt buckle
- 2 zips for the chest pockets
Cutter's Must
- From main fabric:
- Collar – 2 pieces
- Stand Collar – 2 pieces
- Cuff – 2 pieces
- Sleeve – 2 pieces
- Pocket – 2 pieces
- Front Pocket Flap – 4 pieces
- Bigger Pocket Bag Of Upper Pocket – 2 pieces
- Front – 2 pieces
- Back – 2 pieces
- Belt-Loop – 1 piece
- Waistband – 1 piece
- Shoulder Strap – 4 pieces
- Center Front Facing – 2 pieces
- From lining fabric:
- Smaller Pocket Bag Of Upper Pocket – 2 pieces
- From fusible interfacing: Front Pocket Flap, Shoulder Strap, Center Front Facing, Cuff, and stay tape for the chest pocket openings.
Sewing Instructions
- Fuse interfacing to the Center Front Facing, Front Pocket Flap, Shoulder Strap and Cuff.
- Place the Collar pieces right sides together and stitch around the outer edge. Trim the allowances, turn the collar right side out and push out the corners. Press the collar.
- Mark the placement of the upper (chest) pocket on the Front. Reinforce the pocket opening with stay tape. Cut the pocket welt strips. Fold the welt strips in half, wrong sides together, and press. Mark a guide line on the welts parallel to the fold for attaching them. Mark guide lines parallel to the pocket opening for attaching the welts. Stitch the welts to the Front, ending the stitching exactly at the end lines of the pocket marking. Check from the wrong side that the stitching lines are parallel. Cut the pocket opening, making diagonal cuts toward the corners 1–1.5 cm from each end. Turn the welts through the opening to the wrong side, straighten the edges and adjust the welt ends. Secure the triangles at the pocket ends from the wrong side with a double backstitch. Place the zipper under the edges of the pocket opening so that the teeth are visible. Stitch in the zipper and stitch the Smaller Pocket Bag Of Upper Pocket and the Bigger Pocket Bag Of Upper Pocket to the welt allowances. Stitch the pocket bags together and serge.
- Place the Front Pocket Flap pieces right sides together and stitch. Trim the allowances at the corners and turn right side out. Press the flap to its finished shape. Serge the upper edge of the flap.
- Serge the upper edge of the Pocket. Press the upper allowance of the Pocket to the wrong side and topstitch. Serge the outer edge of the Pocket and press the allowances under using the pattern.
- Mark the placement of the Pocket and flap on the Front. Topstitch the Pocket to the Front 0.2 cm from its edge. Stitch the flap at the marking, flip it down and topstitch.
- Place the Shoulder Strap pieces right sides together and stitch around, leaving the upper (armhole) edge open. Turn the strap right side out, press and topstitch around the edge.
- Fold the Waistband (belt) in half lengthwise, right sides together. Stitch on three sides, leaving a small opening for turning. Turn the belt right side out and press. Topstitch around the belt 0.5 cm from the edge. Slide the buckle onto the belt. Fold the end of the belt to the wrong side around the buckle bar to form a loop and topstitch.
- Serge the outer (long) edge of the Center Front Facing. Place the facing on the Front, right sides together, pin and stitch along the marked line, stitching from the Front side. Stitch the lower edges of the facings to the Front exactly along the marked hemline. Trim the allowances at the lower corners. Remove the pins. Turn the facings to the inside, straighten the seams and press. Baste the neckline edges of the Front and facing together.
- Serge the center back edges. Stitch the center back seam and press it open.
- Serge the side and shoulder edges. Stitch the shoulder and side seams and press them open. Place the Shoulder Strap on the shoulder seam and baste it to the armhole edge 0.5 cm from the edge. Serge the lower edge of the jacket.
- Fold the Belt-Loop strip lengthwise in half, right sides together, align the edges and stitch 0.5–0.7 cm from the edges. Turn right side out, rolling the seam to the fold or forming a 0.1–0.2 cm wide edge toward the inside, and press. Cut the strip into belt loops according to the markings. Mark the positions and topstitch the belt loops over the side seams at the waistline.
- Stitch the Stand Collar pieces together with the Collar sandwiched between them.
- Stitch the inner stand with the collar to the neckline. Turn under the open edge of the outer stand and topstitch it into the stand attachment seam. Topstitch along the collar. Tack the Center Front Facings to the shoulder seams with a 1 cm bar tack.
- Serge the Sleeve edges. Stitch the sleeve seams and press them open.
- Fold the Cuff lengthwise in half, wrong sides together, and press. Unfold it, stitch the short ends into a ring and press the seam open. Press the cuff in half again.
- Stitch the Cuffs to the lower edges of the sleeves and serge the cuff and sleeve allowances together. Topstitch the cuff seam allowance onto the sleeve.
- Set in the sleeves, easing the sleeve cap.
- Turn up and topstitch the hem of the jacket.
- Make buttonholes on the right Front and sew buttons on the left Front. Mark the positions and sew a button on each Shoulder Strap.