Professional made-to-measure digital sewing patterns — PDF · PLT · DXF AAMA

Minervainervabeta
#5290
#5292

Cold Shoulder Collared Drawstring Shirt

Pattern #5291

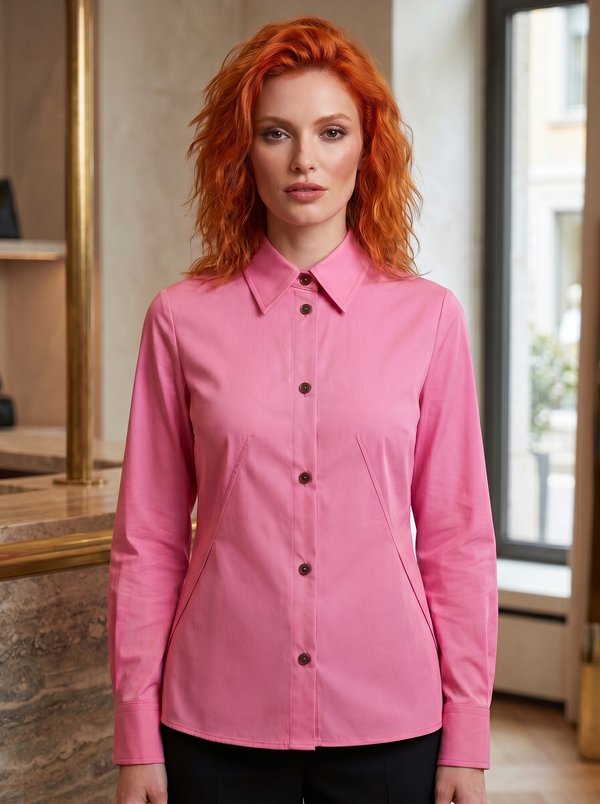
A women's cropped shirt with a pointed collar, a buttoned front with a folded placket and long sleeves made of an upper and a lower part, with the seam between them left open on the upper arm. A drawstring in a topstitched casing gathers the body above the hem. Drafted to your own measurements. Recommended fabric: cotton, linen or blended fabrics.

Tech. Description

Cold Shoulder Drawstring Shirt

A women's cropped shirt with a pointed collar, a buttoned front with a folded placket and long sleeves made of an upper and a lower part, with the seam between them left open on the upper arm. A drawstring in a topstitched casing gathers the body above the hem.

When To Wear

  • In spring and summer, with high-waisted trousers, jeans or skirts.
  • For casual daytime wear; the drawstring can be pulled in or left loose.

Key Design Features

Silhouette: Straight and loose, gathered by the drawstring a short distance above the hem, which forms a frill below the casing.

Length: Cropped, around the high hip.

Collar: Pointed collar without a separate stand; the upper collar is interfaced.

Front: Cut-on placket pressed double to the wrong side and interfaced; buttonholes on the right front.

Sleeves: Long set-in sleeves in two parts. The seam joining the upper and lower sleeve is left open between notches, which opens the sleeve on the upper arm; the joining seam is topstitched.

Waist: Front and back casings joined into one strip and topstitched to the wrong side along markings; the ties exit through two buttonhole openings on the fronts.

Back: One piece, no yoke.

Finishing: Casing edges pressed under 0.8 cm; ties stitched 0.7 cm from the fold; sleeve and body hems turned up and topstitched.

Level Of Difficulty

Intermediate. Collar setting, a folded front placket, buttonholes, a topstitched drawstring casing and a sleeve seam with an open section.

Fabric Recommendations

Cotton, linen or blended fabrics.

Additional Supplies

  • Fusible interfacing (placket, upper collar, small pieces behind the drawstring openings)
  • 6 buttons

Cutter's Must

  • From main fabric:
  • Front – 2 pieces
  • Back – 1 piece
  • Collar – 2 pieces
  • Upper Sleeve – 2 pieces
  • Lower Sleeve – 2 pieces
  • Back Casing – 1 piece
  • Front Casing – 2 pieces
  • Drawstring ties – cut to the required length (no pattern piece)
  • From fusible interfacing: upper Collar – 1 piece.

Sewing Instructions

  1. Fuse interfacing to the placket area of the fronts and to the upper Collar.
  2. On the fronts, work the drawstring openings like buttonholes, first pressing a small scrap of interfacing to the wrong side.
  3. Press the placket to the wrong side along the fold lines. Press the double-folded plackets to the wrong side, baste them along the neckline edges of the fronts and stitch them across at the lower edges of the fronts.
  4. Stitch the shoulder seams of the shirt.
  5. Stitch the side seams of the shirt.
  6. Stitch the under collar and upper collar together around the edge, press the seam open and turn the collar right side out.
  7. Stitch the under collar to the neckline, turn under the open edge of the upper collar and stitch it in place along the under collar attachment seam.
  8. Stitch the Upper Sleeve to the Lower Sleeve, leaving the seam open between the notches. Topstitch along the seam joining the sleeve parts.
  9. Stitch the sleeve seams.
  10. Press the sleeve hem allowance to the wrong side and topstitch.
  11. Set in the sleeves, easing the sleeve cap.
  12. Stitch the Front Casings and Back Casing together into one strip.
  13. Press the long edges of the casing strip 0.8 cm to the wrong side. Place the strip on the wrong side of the shirt, turn under the ends and baste. From the right side of the shirt, topstitch the strip along the markings on the fronts and back.
  14. Turn in the ends of the ties. Fold each tie lengthwise and stitch 0.7 cm from the fold. Turn the ties right side out and press. Sew the ends closed. Thread the ties through the casing.
  15. Turn up and topstitch the hem of the shirt.
  16. Work buttonholes on the right front and sew buttons on the left front.

Order Pattern

Standard Sizes

Individual Measurements

Please double-check the file format and paper size. Your pattern is drafted in exactly the format you select; a different format or paper size later is a new order.

Similar patterns

View all
Support

Minerva Support

Online
Support
Hi! I'm Minerva's AI assistant. What can I help you with?