Professional made-to-measure digital sewing patterns — PDF · PLT · DXF AAMA
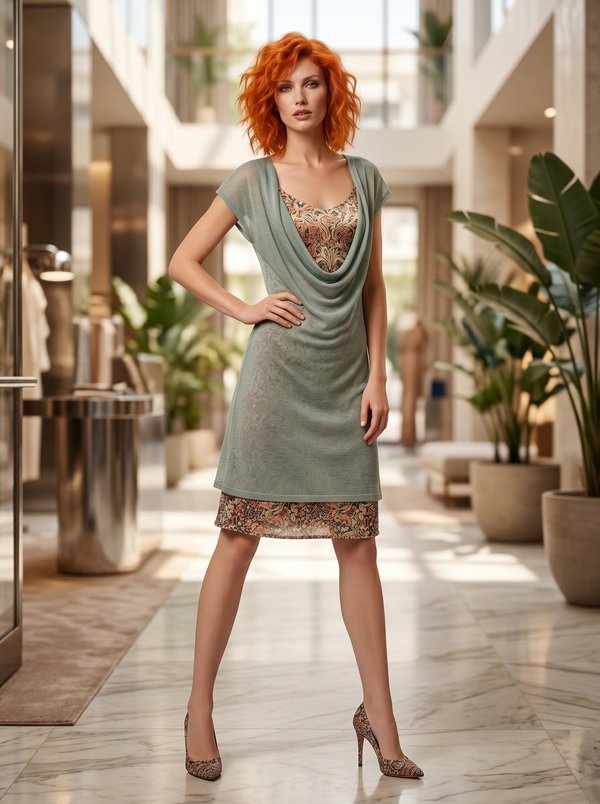
A sleeveless women's dress with a princess-seam bodice, a wide band framing the scooped neckline, a separate waistband and a flared two-layer skirt. The bodice and waistband are lined; the dress closes with a concealed zipper at the centre back. Drafted to your own measurements. Recommended fabric: thin dress fabrics with good drape, of natural or blended fibres, for example crepe chiffon.
A sleeveless women's dress with a princess-seam bodice, a wide band framing the scooped neckline, a separate waistband and a flared two-layer skirt. The bodice and waistband are lined; the dress closes with a concealed zipper at the centre back.
Silhouette: Fitted bodice and waist, skirt flaring out from the waistband.
Length: Knee length, with the underskirt showing slightly below the upper skirt on the drawing.
Neckline: Wide round neckline edged with a band: a double facing, interfaced, stitched along the neckline, turned out and attached to the right side of the bodice.
Sleeves: Sleeveless; the armholes are finished by stitching the lining to the main fabric.
Front: Centre front panel and two side front panels joined by princess seams from the armhole.
Back: Centre back and side back panels with princess seams; centre back seam with a concealed zipper.
Waist: Separate interfaced waistband, one piece at the front and two at the back.
Skirt: Two layers, an upper skirt over an underskirt, joined at the waist; each layer has its own centre back seam and its own hem.
Finishing: Overlocked seams; 2 cm turned-up hems on both skirt layers.
Lining: Bodice and waistband lined, cut from the same pattern pieces.
Intermediate. Princess seams, a bodice lined to the armholes, a neckline band set on the right side, and a concealed zipper through two skirt layers.
Thin dress fabrics with good drape, of natural or blended fibres, for example crepe chiffon.
If the pattern pieces have a double outline, seam allowances are included.
If the pattern pieces have a single outline, seam allowances are not included.
All seams — 1 cm
Hem allowance for skirt — 2 cm
If the pattern pieces have a double outline, seam allowances are included.
If the pattern pieces have a single outline, seam allowances are not included.
Seam Allowances:
First, print the paper pattern and lay it out according to the fabric width (fabric width may vary from 90 cm to 150 cm) to determine the required amount of fabric.
Do not forget to consider paired and symmetrical pieces.
When sewing, carefully match all notches (cut marks) — they must align correctly.
From main fabric:
From lining fabric:
Lining pieces are cut using corresponding main patterns
From fusible interfacing:
Fusible interfacing pieces are cut using corresponding main patterns

#2022
Empire-Waist Dress with Twisted Bust Detail
#2021
Two Layer Dress

#2025
Asymmetric Draped Dress with Cascading Shoulder Ruffle

#2026
Halter Dress with Folded Stand Collar

#2027
Sheath Dress with Scalloped Neckline Facing

#2031
V-Neck Pinafore Dress with Pockets

#2010
Empire Waist Layered Chiffon Bridal Dress

#2009
Wedding Dress with a Layered Asymmetrical Skirt

Minerva Support
Online