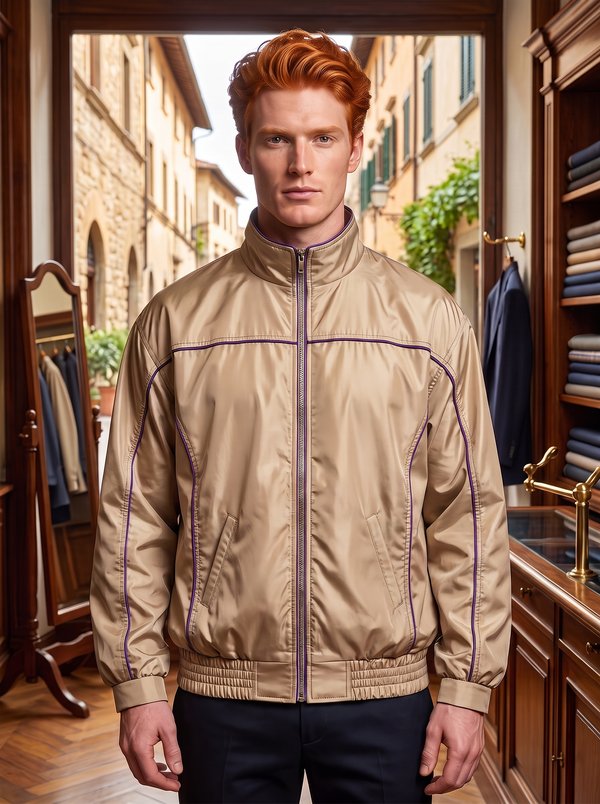
Full-Zip Stand Collar Color Block Jacket
A men's hip-length zip-front jacket with a stand collar and curved yokes and insets for colour blocking, piped with corded piping. Piped slanted welt pockets, elasticated cuffs and a drawcord hem.
When To Wear
- In spring and autumn for walks, travel and outdoor sport, over a T-shirt or sweatshirt.
- With a fleece lining as a warmer jacket for cool weather.
Key Design Features
Silhouette: Relaxed, straight body, drawn in at the hem by the cord.
Length: Hip length.
Collar: Stand collar; the upper collar is backed with thin wadding, the under collar is sewn to the lining neckline; topstitched along the edge.
Sleeves: Each sleeve is cut in two halves with a centre seam that continues the shoulder seam; the yokes run from the chest and back over the shoulder into the sleeve, with sleeve insets below. Cuffs with 4.5 cm elastic held by two rows of topstitching.
Front: Separating zip running up to the top of the collar, set between the front and the lining; front edges topstitched.
Pockets: Slanted single-welt pockets with piping along the welt edge; the pocket bags reach the zip seam and the hem.
Back: Back yoke and two curved back insets; yoke seams piped and topstitched.
Finishing: Seams topstitched; 3.5 cm hem with small buttonholes for an elastic cord and two cord stoppers.
Lining: Full lining; the front facings are topstitched onto the front lining.
Level Of Difficulty
Intermediate. Making corded bias piping and setting it into curved seams, many shaped insets that must match, piped welt pockets, elasticated cuffs and a separating zip set between shell and lining.
Fabric Recommendations
Polyester raincoat fabrics; the insets can be cut in different colours. For the lining, knit mesh, or fleece or Polartec for a warmer jacket.
Additional Supplies
- Lining fabric (knit mesh, fleece or Polartec)
- Thin synthetic wadding
- Fusible interfacing
- 1 separating zip, length to match the front edge including the collar height
- Cord for piping
- Elastic tape, 4.5 cm wide, for the cuffs
- Elastic cord for the hem
- 2 cord stoppers
Cutter's Must
- Main fabric:
- Front – 2 pieces
- Back – 1 piece
- Back Yoke – 1 piece
- Front Yoke – 2 pieces
- Back Inset – 1 piece
- Back Inset 2 – 1 piece
- Front Inset – 2 pieces
- Front Inset 2 – 2 pieces
- Center Sleeve – 4 pieces
- Sleeve Inset – 4 pieces
- Collar – 2 pieces
- Cuff – 2 pieces
- Center Front Facing – 2 pieces
- Bigger Pocket Bag – 2 pieces
- Smaller Pocket Bag – 2 pieces
- Off-Set Welt – 2 pieces
Cut bias strips 3.5cm wide from the main fabric for making piping. The length of the strips depends on the length of the piping. Attention! After making the piping, a 1 cm seam allowance must remain. Otherwise, adjust the width of the cut strips yourself.
- Lining:
- Front Lining – 2 pieces
- Back Lining – 1 piece
- Sleeve Lining – 2 pieces
Thin wadding (Syntepon): back the upper Collar piece cut from the main fabric with wadding, stitching them together along the edges. Fusible interfacing: Off-Set Welt and the pocket placement area on the Fronts.
Sewing Instructions
- Making piping. Stitch the bias strips together and press the seams. Fold the resulting strip in half, insert the cord inside, and stitch close along the cord.
- Welt pockets. Fuse the Off-Set Welt with fusible interfacing, fold it in half lengthwise and press. Fuse the pocket placement area on the front with fusible interfacing. Mark a line on the welt that defines the finished welt width. Stitch the piping to the outer side of the welt, and stitch the Smaller Pocket Bag to the inner side. Place the welt with the pocket bag on the right side of the front, aligning the pocket marking line with the line on the welt. The outer side of the welt should face the right side of the front. Stitch the welt. Stitch the Bigger Pocket Bag along the upper pocket marking line. Cut the pocket opening in the middle between the marking lines, making diagonal cuts towards the pocket marking corners. Turn the pocket pieces to the wrong side. Ease out the seams and press. Stitch the pocket bags together along the edges, catching the triangular ends at the pocket corners. The edges of the pocket bags should be caught in the front zipper seam and reach the hemline.
- Assembling the jacket. Stitch the Front Insets and Back Inset to the front and back yokes, inserting the piping. Topstitch. Stitch the yokes to the Center Sleeve pieces. Topstitch the seam on the sleeve side. Stitch Front Inset 2 and Back Inset 2 to the fronts and back. Topstitch on the back and fronts. Stitch the Sleeve Insets to the back and fronts. Topstitch. Stitch the yokes to the back and fronts. Topstitch. Stitch the shoulder seam, which continues into the center seam of the sleeve. Topstitch the shoulder seam along the back. Stitch the side seams and sleeve seams. Stitch the upper collar into the neckline.
- Lining. Press under the inner edge of the Center Front Facing and topstitch the facing onto the Front Lining. Stitch the jacket lining together. Stitch the under collar into the lining neckline.
- Cuffs. Stitch the cuffs and the elastic tape into rings separately. Insert the elastic tape into the cuff, stretch to the cuff length, and sew 2 rows of topstitching. For industrial processing, it is recommended to first secure the elastic tape in the cuff, and then join the cuff into a ring with a lapped seam. Stitch the cuffs to the sleeves, catching the edge of the elastic in the seam.
- Zipper fastening. Place each half of the separating zipper on the front edge of the jacket, right sides together (teeth pointing away from the edge). Stitch the lining to the front edges and collar edges, catching the zipper in the seam at the same time. Turn the garment to the right side.
- Stitch the lining to the cuffs.
- Sew small buttonholes for the cord in the hem allowance. Press the bottom hem, turning up 1cm first, then 3.5cm. Topstitch the bottom hem.
- Topstitch the front edges and collar.
- Press the finished jacket.
- Thread the elastic cord through the hem from the wrong side and fit the cord stoppers.