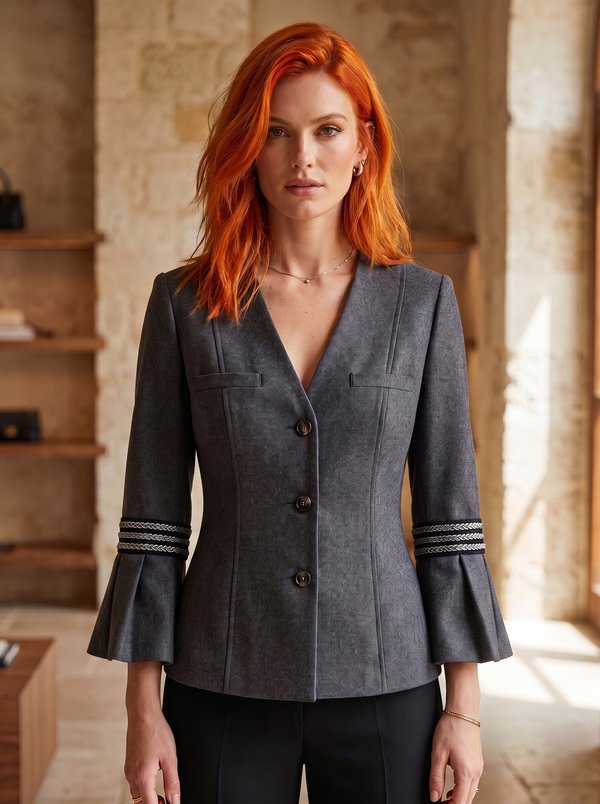
Belted Blazer With Broad Lapels
A women's hip-length lined jacket with an asymmetric wrap-over front, broad rounded lapels cut as separate pieces, a rounded collar on a stand, wide 3/4 raglan sleeves and a tie belt attached at the left side seam.
When To Wear
- Office wear over a top or fine knit, with straight trousers or a pencil skirt.
- Spring and autumn, as a light outer layer over dresses.
Key Design Features
Silhouette: Semi-fitted body shaped with vertical darts on the fronts and back, drawn in at the waist by the belt.
Length: Hip length.
Collar: Rounded collar set between two stand pieces, with interfaced upper collar and upper stand. Broad lapels with rounded edges are made from two pieces each, turned and stitched to the neckline together with the collar.
Front: Asymmetric wrap: the right front laps deep over the left and fastens with two buttons; interfaced fronts and facings, front edges understitched 0.2 cm from the seam.
Sleeves: Wide, flared 3/4-length raglan sleeves, each cut in two parts (front and back) with a seam running along the top of the arm; underarm and side seams stitched in one pass. Raglan shoulder pads.
Back: Centre back seam and vertical darts.
Waist: Self-fabric tie belt, edgestitched 0.1 cm from the edge all round, fixed in the left side seam and tied at the front.
Lining: Full lining including the sleeves, attached to the facings and to the jacket and sleeve hems; the jacket is turned through an opening in the right sleeve lining seam.
Level Of Difficulty
Intermediate. A collar on a stand combined with separate lapels, a faced asymmetric front with buttonholes, raglan sleeves and a bagged full lining.
Fabric Recommendations
Suiting fabrics made from natural or blended fibres.
Additional Supplies
- Lining fabric
- Fusible interfacing (fronts, front facings, back neck facing, upper collar, upper stand, upper lapels)
- Raglan shoulder pads
- 2 buttons
Cutter's Must
- From main fabric:
- Back – 2 pieces
- Front – 2 pieces
- Collar – 2 pieces
- Stand Collar – 2 pieces
- Lapel – 4 pieces
- Back Neckline Facing – 1 piece
- Center Front Facing – 2 pieces
- Front Sleeve – 2 pieces
- Back Sleeve – 2 pieces
- Waistband (tie belt) – 1 piece
- From lining fabric:
- Back – 2 pieces
- Front – 2 pieces
- Front Sleeve – 2 pieces
- Back Sleeve – 2 pieces
- From fusible interfacing:
- Front – 2 pieces
- Center Front Facing – 2 pieces
- Back Neckline Facing – 1 piece
- Collar – 1 piece
- Stand Collar – 1 piece
- Lapel – 2 pieces
Attention: The Front and Back lining pieces are cut from the main patterns minus the width of the Center Front Facing and the Back Neckline Facing, respectively.
Sewing Instructions
- Fuse interfacing to the Center Front Facings, Back Neckline Facing, Fronts, upper Collar, upper Stand Collar and upper Lapels.
- Mark the darts on the Back. Stitch the back darts and press them towards the center. Mark the darts on the Front. Stitch the front darts and press them towards the center. Slash the dart folds open.
- Stitch the center back seam. Press seam open. Stitch the Back Sleeves to the Back. Stitch the Front Sleeves to the Fronts. Press seams open.
- Stitch the upper (shoulder) sleeve seams. Press seams open. Stitch the underarm sleeve seams and side seams in one continuous line. Press seams open.
- Place the Collar pieces right sides together. Stitch the ends and outer edge of the collar. Trim seam allowance. Turn the collar right side out and press. Place the Stand Collar pieces right sides together, insert the finished collar between them, match the notches and stitch, stitching the ends of the stand at the same time. Turn the stand right side out and press.
- Place the Lapel pieces right sides together in pairs and stitch along the contour, leaving the neckline edge open. Trim seam allowance. Turn the lapels right side out and press.
- Stitch the collar and lapels to the jacket neckline. Press seam.
- Stitch the shoulder seams of the Back Neckline Facing and Center Front Facings. Press seams open.
- Place the facings on the jacket, right sides together, and stitch along the front edges and neckline. Understitch the front edge seam allowance to the facing, 0.2 cm from the seam. Turn the front edges right side out and straighten the seams.
- Assemble the lining pieces, leaving an opening in the right sleeve seam.
- Press up the hem allowance of the jacket and sleeves. Attach the shoulder pads. Stitch the lining to the inner edges of the Center Front Facings and Back Neckline Facing. Stitch the lower corners of the front edges. Trim the seams at the corners. Stitch the lining to the hem of the jacket and the sleeves. Turn the jacket right side out through the opening in the sleeve. Stitch the opening closed.
- Make buttonholes on the right front; sew the buttons on the left front.
- Fold the Waistband (belt) in half lengthwise, right sides together, and stitch along the long side and one short side. Turn the belt right side out, turn in the seam allowances of the unstitched section, and topstitch 0.1 cm from the edge all around. Attach the belt to the left side seam.