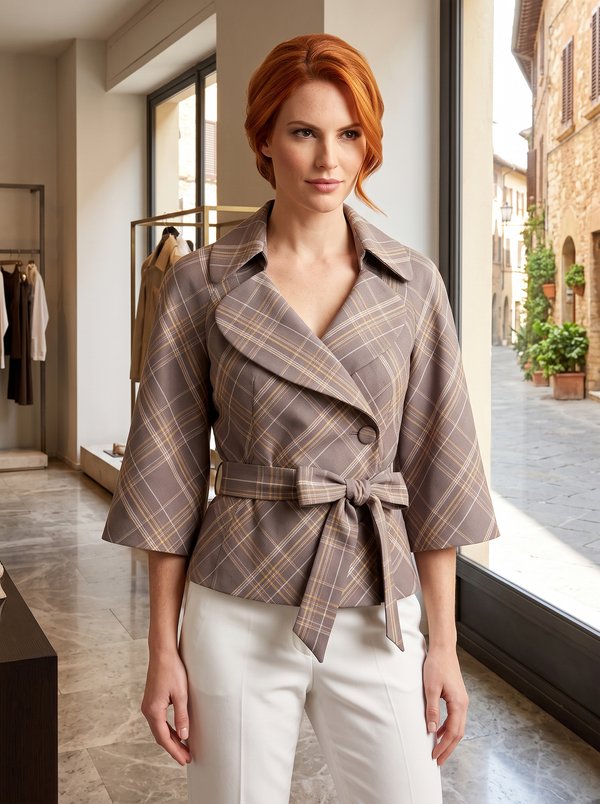
Fitted V-Neck Jacket with Pleated Cuffs
A women's fitted, fully lined jacket with a collarless V-neckline, princess seams front and back, two chest welt pockets and a three-button front. The two-piece sleeves end in a flared pleated cuff, with decorative braid stitched above it.
When To Wear
- To the office with straight trousers or a pencil skirt.
- Over a dress or a fine top in spring and autumn.
Key Design Features
Silhouette: Fitted, shaped by princess seams on the front and back.
Length: Hip length, straight hem.
Neckline: V-neck without a collar, finished with front facings and a back neck facing; the front neckline is stabilised with fusible tape and slightly eased.
Sleeves: Two-piece set-in sleeves with a cuff joined into a ring and laid in pleats so that it flares; wide decorative braid is stitched around the lower sleeve above the cuff.
Closure: Single-breasted, 3 buttons, buttonholes on the right front.
Pockets: Two single-welt pockets on the upper fronts.
Back: Centre back seam and princess seams.
Finishing: Front edge seam allowance understitched to the facing 0.2 cm from the seam; cuff hem secured with fusible web; shoulder pads.
Lining: Full lining including the sleeves, attached to the facings, the hem and the cuff seam.
Level Of Difficulty
Intermediate. Welt pockets, princess seams, two-piece set-in sleeves with pleated cuffs, and a full bagged lining.
Fabric Recommendations
Suiting fabrics from natural or blended fibres.
Additional Supplies
- Lining fabric
- Fusible interfacing (fronts, front facings, back neck facing, welts) and fusible tape for the front neckline
- Fusible web
- Shoulder pads
- Wide decorative braid
- 3 buttons
Cutter's Must
- From main fabric:
- Center back – 2 pieces
- Side back – 2 pieces
- Side front – 2 pieces
- Center front – 2 pieces
- Front Facing – 2 pieces
- Back Neck facing – 1 piece
- Upper sleeve – 2 pieces
- Lower sleeve – 2 pieces
- Cuff – 2 pieces
- Welt – 2 pieces
- From lining fabric:
- Center back – 2 pieces
- Side back – 2 pieces
- Side front – 2 pieces
- Center front – 2 pieces
- Upper sleeve – 2 pieces
- Lower sleeve – 2 pieces
Attention: back and front pieces from lining fabric are cut without considering the width of the back neck facing and front facing respectively.
From fusible interfacing: front facing, back neck facing, center front, side front, welt.
Sewing Instructions
- Fuse fusible interfacing to the front facing, back neck facing, center front, and side front.
- Stitch the princess seam on the front. Press the princess seam open on the front.
- Cut a pocket underlay from the main fabric, equal to the pocket opening length plus 1.5 – 2.0 cm on each side, and 4 cm wide. Mark the position of the upper pockets. Fuse the pocket opening. Press the welt in half lengthwise, wrong sides together. Stitch the welt to the front along the lower pocket marking line. Stitch the pocket underlay to the front along the upper pocket marking line. The ends of the stitching should stop at the short marking lines. Check the accuracy of the welt and underlay attachment from the wrong side (stitches should be parallel). Cut the pocket opening. Make diagonal cuts 1-1.5 cm from the end of the pocket. Turn the welt and underlay to the wrong side through the opening, adjusting the ends of the welt so that the fold meets the underlay attachment seam. Secure the ends of the pocket from the wrong side with a double backstitch at the base of the corners. Topstitch the welt to the underlay in the attachment seam.
- Stitch and press open the center back seam. Stitch and press open the princess seams on the back. Stitch and press open the shoulder and side seams of the jacket.
- Stitch and press open the shoulder seams of the back neck facing and front facing.
- Apply an additional fusible interfacing strip along the neckline edge of the front. Place the front facing with the facing on the right side of the front, right side down, pin, and stitch the front edge, front neckline, and back neckline. Stitching is done from the front side, slightly easing the front neckline of the jacket. Topstitch the seam allowance of the front edge on the closure section to the front facing. The stitching should be 0.2 cm from the seam (stopping 3 cm before the bottom corner). Turn the front edges to the right side, straighten the seams.
- Stitch and press open the elbow seam of the sleeve. Topstitch decorative trim strip along the bottom of the sleeve, placing it parallel to the lower seam allowance and not extending beyond it. Stitch and press open the front seam of the sleeve.
- Stitch the cuff into a loop. Press the seam allowances open and overlock. Overlock the lower edge of the cuff, press the lower edge seam allowance to the wrong side and secure with fusible interfacing web. Form and press the pleats according to the markings. Place the cuff with the lower edge of the sleeve, right sides together, and stitch. Press the seam allowance towards the sleeve.
- Set the sleeves into the armholes according to the notches. Attach shoulder pads.
- On the lining fabric pieces, stitch the seams and set the sleeves, leaving an opening for turning in the center back seam.
- Stitch the lining to the inner edges of the front facings and the back neck facing. Stitch the bottom corner. Clip the seam allowances on curves, trim corners. Mark and press the bottom of the garment to the wrong side. Finish the bottom of the garment with the lining.
- Stitch the lower edge seam allowance of the sleeve lining into the cuff attachment seam. Turn the jacket to the right side. Stitch the technological opening closed.
- On the right front, make buttonholes; on the left front, sew on buttons.