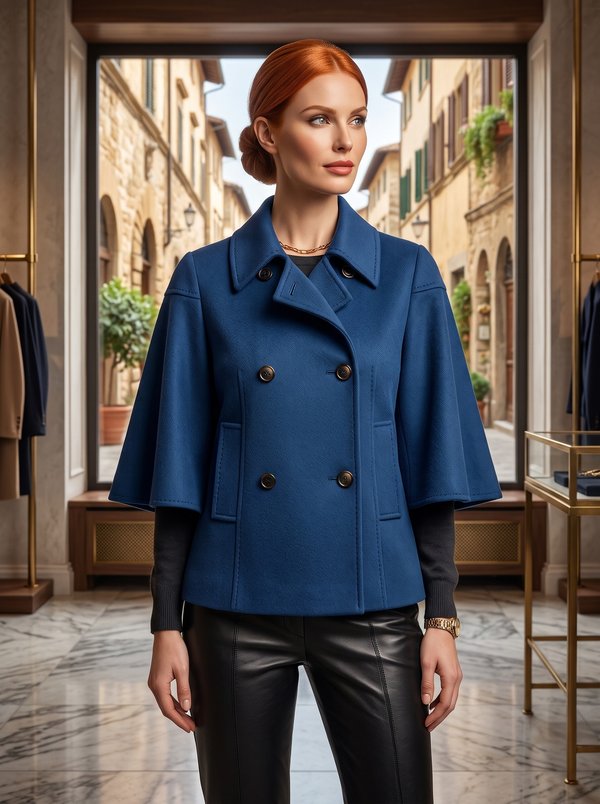
Wool Cape with Concealed Button Placket and Neck Tab
A women's cape-style jacket with a collarless round neckline, wide cape sleeves joined to the front and back with curved topstitched seams, and a concealed button fly. A flap cut in one with the right facing and right sleeve buttons at the neckline.
When To Wear
- As a light outer layer in spring and autumn, over dresses, blouses and fine knitwear.
- With slim trousers or a straight skirt, so the volume stays at the shoulders and arms.
Key Design Features
Silhouette: Wide cape shape; the sleeve is one large piece set between the front and the back with curved seams.
Neckline: Round, collarless, finished with the front facings and a back neckline facing and topstitched.
Sleeves: Wide cape sleeves; the sleeve seams are pressed towards the sleeve, overlocked and topstitched.
Closure: Concealed fly on the right front: buttonholes worked through a welted fly lining in the right facing, with bar tacks between them. A flap cut in one with the right facing and right sleeve has its own buttonhole; 5 buttons in total.
Back: Centre back seam, pressed to the left, overlocked and topstitched.
Finishing: The facings are stitched to the front edge, neckline and hem; the left edge, neckline and flap are topstitched, and the right front is topstitched along the fly line down to the hem. Hem turned and topstitched.
Level Of Difficulty
Intermediate. A welted concealed fly with buttonholes and bar tacks, a cut-on flap, and long curved sleeve seams that must be topstitched evenly.
Fabric Recommendations
Fine wool fabrics.
Additional Supplies
- Lining fabric (fly linings)
- Fusible interfacing (facings, back neckline facing, one fly lining)
- 5 buttons
Cutter's Must
- From main fabric:
- Back – 2 pieces
- Front – 2 pieces
- Sleeve – 2 pieces
- Center Front Facing – 2 pieces
- Back Neckline Facing – 1 piece
- From lining fabric:
- Hidden Button Placket Lining – 2 pieces
- From fusible interfacing: Center Front Facing, Back Neckline Facing, one Hidden Button Placket Lining.
Sewing Instructions
- Fuse interfacing to the center front facings, the back neckline facing and one hidden button placket lining.
- Cut the cut-on flap off the LEFT center front facing and the LEFT sleeve along the marked line; the flap stays on the right center front facing and right sleeve only.
- Stitch the sleeve to the back. Press the seam allowances towards the sleeve, overlock and topstitch.
- Stitch the center back seam. Press the seam allowances to the left side, overlock and topstitch.
- Stitch the sleeve to the front. Press the seam allowances towards the sleeve, overlock and topstitch.
- Overlock the lower edge of the garment.
- Mark the placket opening on the right side of the right center front facing with three lines: the first line runs parallel to the front edge, 1.5 cm from the finished edge; the second and third lines mark the length of the placket. Place the interfaced hidden button placket lining on the right side of the facing, right side down, extending away from the front edge, with its cut edge on the marked line. Stitch 0.5 cm from the marked line along the opening, between the lines that mark its length. Place the second hidden button placket lining edge to edge with the first stitching line and stitch 0.5 cm from it. Check from the wrong side that the two stitching lines are parallel. Cut the opening, making diagonal clips 1–1.5 cm from each end. Turn the linings through the opening to the wrong side, forming a welt as wide as the distance between the stitching lines. Stitch in the seam of the first lining to secure it. Press the second lining towards the inner edge of the facing and stitch 0.1 cm from its seam. Mark and work the buttonholes on the facing, catching the interfaced lining. Straighten the ends of the opening and secure them from the wrong side with a double backstitch across the base of the triangles. Stitch the short edges of the linings together. Make bar tacks between the buttonholes, each as long as the welt is wide. Press the facing.
- Stitch the shoulder seams of the center front facings and the back neckline facing. Overlock the inner edge. Place the facing on the front, right sides together, and stitch along the front edge, neckline and lower edge. Trim the seam allowances at the upper and lower corners. Turn the fronts right side out, straighten the seams and press. Topstitch along the left front edge, the neckline and the cut-on flap.
- Press the lower edge of the garment to the wrong side and topstitch. On the right side of the right front, topstitch along the marks and continue the stitching down to the hem.
- Work a buttonhole on the cut-on flap. Sew on the buttons at the marks.