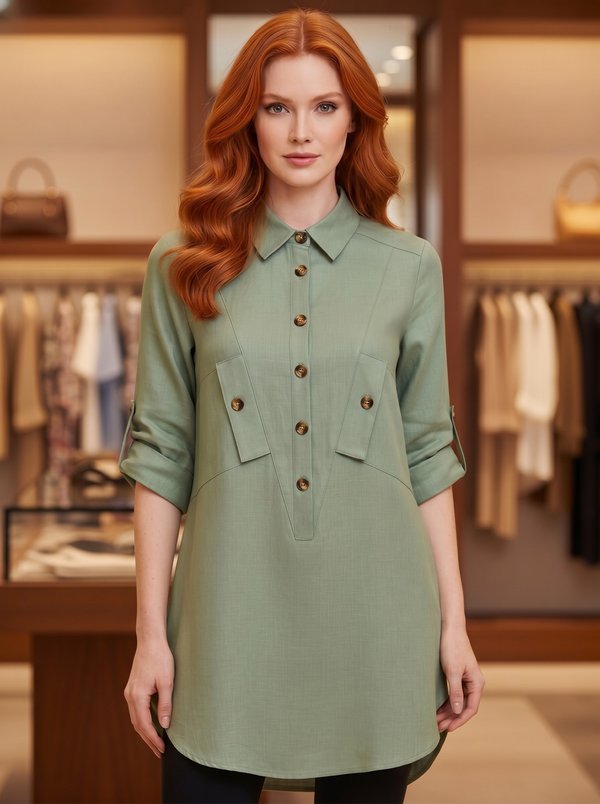
Collared V-Neck Shirt
A women's hip-length shirt with a pointed collar on a stand, a V-shaped front opening with a concealed button placket, and long sleeves with a contrast insert above the cuff.
When To Wear
- With trousers or skirts for the office.
- Tucked into a skirt or worn loose over slim trousers for daytime.
Key Design Features
Silhouette: Semi-fitted, shaped by bust darts on the fronts and vertical waist darts on the fronts and back.
Length: To the hip.
Collar: Pointed collar set between two stand pieces, topstitched, closing with one button at the stand.
Closure: Concealed (fly-front) button placket cut in one with the right front and facing, the buttonholes hidden; the left front edge is understitched 0.2 cm. The fronts form a V below the collar.
Sleeves: Long set-in sleeves, eased at the cap. A band-shaped insert sits between the sleeve and the cuff, with a slit topstitched 0.5 cm and a bar tack at the top; the insert can be cut from pleated fabric. Buttoned cuffs.
Back: Centre back seam and waist darts.
Finishing: Seams overlocked; hem overlocked, turned and topstitched.
Level Of Difficulty
Intermediate. A concealed placket, a collar on a stand, cuffs with slits in the sleeve inserts, and darts in thin fabric.
Fabric Recommendations
Thin silk and viscose fabrics. For the sleeve inserts, pleated fabric can be used.
Additional Supplies
- Fusible interfacing (facings, upper collar, collar stand, cuffs)
- 8 buttons
Cutter's Must
From main fabric:
- 1. Collar – 2 pieces
- 2. Stand Collar – 2 pieces
- 3. Back – 2 pieces
- 4. Right Front – 1 piece
- 5. Left Front – 1 piece
- 6. Sleeve – 2 pieces
- 7. Cuff – 2 pieces
- 8. Right Front Center Facing – 1 piece
- 9. Left Front Center Facing – 1 piece
- 10. Insert – 2 pieces
- From fusible interfacing: Right Front Center Facing, Left Front Center Facing, one Collar piece (upper collar), Cuff, Stand Collar.
Sewing Instructions
- Fuse interfacing to the Right Front Center Facing, Left Front Center Facing, upper collar, Cuffs and Stand Collar pieces.
- Mark and stitch the bust darts on the fronts and the vertical waist darts on the fronts and back.
- Overlock the centre back edges, stitch the centre back seam and press it to one side.
- Overlock the inner edge of the Left Front Center Facing and Right Front Center Facing.
- Press the cut-on placket facings of the Right Front and of the Right Front Center Facing to the wrong side. Mark and work the buttonholes on the Right Front Center Facing. Place the facings on the fronts, right sides together: on the left front, stitch along the front edge and the neckline; on the right front, stitch along the neckline only. Stitch with the front on top, from the bottom up. Understitch the left front edge seam allowances onto the facing, 0.2 cm from the seam. Turn the front edges right side out and ease out the seams. Stitch the cut-on placket facings together and overlock them. Topstitch along the front edge to secure the placket.
- Overlock the shoulder edges, stitch the shoulder seams and press them towards the back.
- Overlock the side edges, stitch the side seams and press them towards the back.
- Place the under collar and upper collar right sides together and stitch around the outer edges. Trim the seam allowances at the corners and turn the collar right side out. Press the collar.
- Stitch the two Stand Collar pieces together with the collar sandwiched between them.
- Stitch the inner stand, with the collar, to the neckline. Turn under the open edge of the outer stand and stitch it in the ditch of the first seam. Turn under the free ends of the stand and stitch them together. Topstitch around the collar.
- Stitch the Insert to the lower edge of the Sleeve. Overlock the seam and press it towards the sleeve. Mark the slit on the insert, cut it, overlock the edges, turn them to the wrong side and topstitch 0.5 cm from the edge; make a bar tack at the top of the slit. Tip: you can use pleated fabric for the insert.
- Stitch the sleeve seams and overlock them.
- Stitch the short ends of the Cuff, trim the seam allowances at the corners and turn the cuff right side out. Press the cuff.
- Stitch the outer layer of the cuff to the lower edge of the sleeve insert; turn under the seam allowance of the inner layer and stitch it in the ditch of the first seam.
- Set in the sleeves, easing the sleeve cap. Overlock the seam.
- Overlock the hem allowance, turn it to the wrong side and topstitch along the edge.
- Mark and sew the buttons on the left front. Mark and work a buttonhole on the stand and on each cuff. Mark and sew a button on the stand and on each cuff.