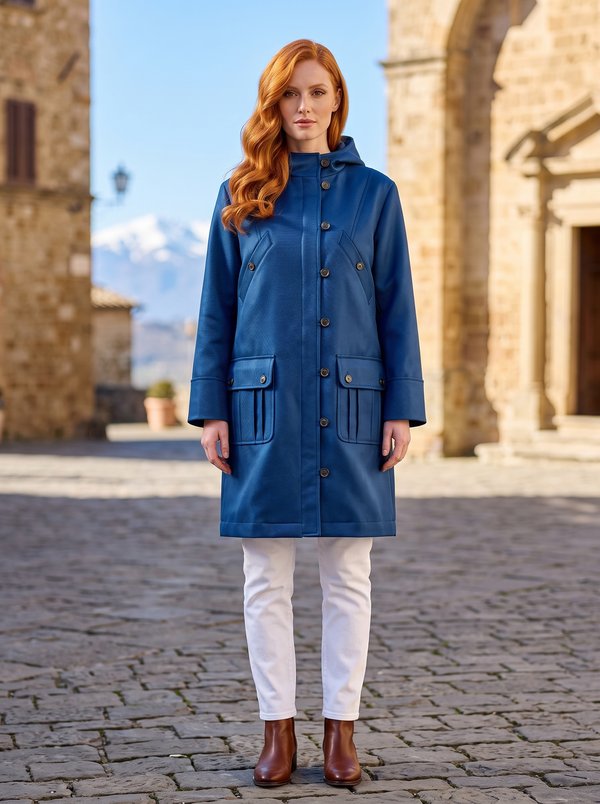
Knee Length Double Breasted Notched Lapel Dress-Coat
A women's knee-length double-breasted dress-coat with notched lapels, two-piece set-in sleeves and flap pockets set into the front darts. The body is cut as a three-panel construction with side panels, has a centre back vent and is fully lined.
When To Wear
- As a dress for the office and business meetings, with tights and court shoes or ankle boots.
- As a light coat in spring and autumn, over a slim dress or trousers.
Key Design Features
Silhouette: Straight, close-fitting, shaped by front and back darts and the seams of the side panels.
Length: To the knee; 3 cm hem allowance on the body and sleeves.
Collar: Notched collar and lapels. The under collar is interfaced and sewn into the neckline; the upper collar is joined to the front facings and back neck facing. The front edge seam is understitched 0.2 cm from the seam: onto the facing along the buttoning, onto the front along the lapels.
Sleeves: Two-piece set-in sleeves with front and elbow seams.
Closure: Double-breasted, six buttons in three pairs with buttonholes, plus a hidden inner button (seven buttons in all); interfaced front facings.
Pockets: Double-welt pockets with flaps, cut through the front darts; the openings are reinforced with stay tape, and each flap is interfaced and slipped into the pocket before being stitched to the upper welt.
Back: Centre back seam ending in an interfaced vent, topstitched diagonally across the top; darts on the back and side panels joining the back to the fronts without a side seam.
Lining: Full lining including the sleeves, attached to the facings and sleeve hems and cut around the vent.
Level Of Difficulty
Advanced. Double-welt pockets with flaps worked through a dart, a notched collar with facings, two-piece sleeves, a lined back vent and a full bagged lining.
Fabric Recommendations
Dress fabrics made of natural or blended fibres.
Additional Supplies
- Lining fabric
- Fusible interfacing (front facings, under collar, vent, flap facings)
- Stay tape for the pocket openings
- 7 buttons
Cutting Plan
From main fabric:
- Middle Back – 2 pieces
- Side – 2 pieces
- Lower Collar – 1 piece
- Upper Collar – 1 piece
- Back Neckline Facing – 1 piece
- Flap – 4 pieces
- Center Front Facing – 2 pieces
- Front – 2 pieces
- Upper Sleeve – 2 pieces
- Lower Sleeve – 2 pieces
- Pocket welts – 4 pieces (cut to the length of the pocket opening; no pattern piece)
From lining fabric:
- Bigger Pocket Lining – 2 pieces
- Smaller Pocket Lining – 2 pieces
- Front Lining – 2 pieces
- Middle Back – 2 pieces
- Side – 2 pieces
- Upper Sleeve – 2 pieces
- Lower Sleeve – 2 pieces
Fabric & Materials
From fusible interfacing: Center Front Facing, Lower Collar, vent area, flap facing, stay tape for the pocket openings.
Sewing Instructions
- Fuse interfacing to the Center Front Facing, the vent, the flap facings and the Lower Collar.
- Place the Upper Collar and Lower Collar right sides together and stitch around the edge. Trim the corners and turn the collar out. Place the Flap pieces right sides together and stitch. Trim the seam allowances at the flap corners and turn out. Press the flaps and collar.
- Mark and stitch the darts on the back. Press the darts towards the centre back. Mark and stitch the darts on the front. Cut the pocket opening. Trim the excess dart allowance. Reinforce the pocket opening with stay tape. Press the dart open.
- Cut the pocket welts. Fold each welt in half, wrong sides together, and press. Mark a guideline on each welt parallel to the fold for attaching it. Mark a guideline on the flap parallel to its upper edge, checking the flap width along its entire length. Mark guidelines parallel to the pocket opening for attaching the flap and welts. Stitch the pocket lining to the flap. Stitch the welts to the front; the stitching lines must end at the parallel pocket marking lines. Check from the wrong side that the welts are attached correctly (the stitching lines must be parallel). Cut the pocket opening, making diagonal cuts into the corners 1–1.5 cm from the ends. Turn the welts through the opening to the wrong side, straighten the edges and adjust the ends so that the pressed folds of the welts meet edge to edge. Secure the pocket ends on the wrong side with a double row of backstitching across the base of the triangles. Insert the flap into the pocket and stitch it to the upper welt. Stitch the other pocket lining into the attachment seam of the lower welt, then stitch the pocket linings together. Stitch the seam joining the Front and Side and press it open.
- Stitch the centre back seam of the Middle Back down to the vent. Press the vent edge under by 1 cm. Press the centre back seam open and press the vent. Topstitch diagonally across the top of the vent according to the marking, catching the vent allowance.
- Stitch the remaining seams joining the Middle Back and Side and press them open. Stitch the shoulder seams of the coat and press them open.
- Stitch the back (elbow) seam of the sleeve and press it open. Stitch the front seam of the sleeve and press it open. Press up the sleeve hem.
- Place the Center Front Facing on the right side of the front, right side down, pin and stitch along the front edge, stitching from the hem upwards to the notch marking the end of the collar attachment. Stitch the lower edges of the facings to the front exactly along the marked hemline. Trim the seam allowances at the upper and lower corners of the front edge. Understitch the front edge seam allowance 0.2 cm from the seam: along the buttoning area onto the facing, along the lapels onto the front. Turn the front edges right side out, ease the seams into place and press. Stitch the shoulder seams of the Back Neckline Facing and Center Front Facing and press them open.
- Stitch the Lower Collar into the coat neckline, and stitch the Upper Collar to the Back Neckline Facing and Center Front Facing. Set the sleeves into the armholes, matching the notches.
- Stitch the seams of the lining pieces, leaving an opening in the front seam of the right sleeve lining, then set in the lining sleeves. Press the lining seams. Stitch the lining to the inner edges of the Center Front Facing and Back Neckline Facing. Press open the collar attachment seam allowances and tack them together close to the seams.
- Stitch the sleeve lining to the sleeve hem allowance, fold the excess lining down and press. Turn the coat right side out. Smooth out the lining, pin its side seams to the side seams of the coat and carefully cut the lining along the vent edges, 1 cm closer to the centre back seam. Stopping 1 cm below the top of the vent, make 1 cm diagonal cuts to both sides. Turn the cut edges under and pin them to the vent edges. Reach between the coat and the lining, take hold of the pinned edges and pull them out one at a time. Stitch the edges and fold the hem allowance down. Straighten the vent edges. At the top of the vent, turn under the lining corner and sew it to the vent allowance.
- Mark and work the buttonholes. Mark and sew on the buttons. Mark and sew on the hidden inner button.