Square Neck Belted Dress with Side Zip
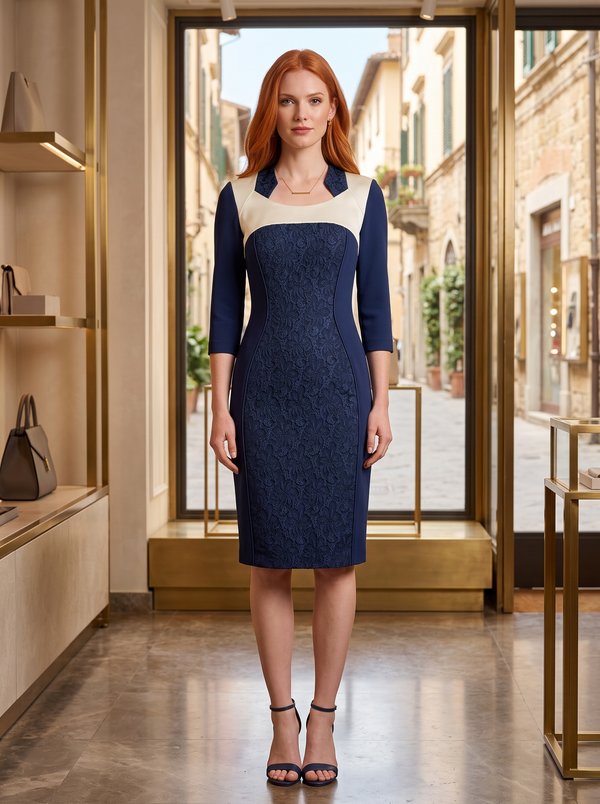
A women's fitted knee-length dress with a waist seam, a square neckline framed by a band that rises into a stand collar at the back, elbow-length sleeves with turned-back cuffs and a back vent. Comes with a hook-fastened belt with a box-pleated trim.
When To Wear
- For the office and business meetings, belted at the waist.
- For daytime events in spring and autumn, on its own or under a light coat.
Key Design Features
Silhouette: Fitted bodice and straight skirt joined at a waist seam; darts at front and back, a bust dart at the front.
Length: Knee length.
Neckline: Square, with a faced centre front. A double band frames the neckline and joins the front yokes; at the back it continues as a stand collar.
Front: Upper bodice cut as a centre panel, side panels and yokes; lower front in one piece.
Sleeves: Elbow-length one-piece set-in sleeves with an eased cap and a double cuff band folded to the outside.
Back: Centre back seam with a lapped vent at the hem; upper and lower back joined at the waist.
Closure: Invisible zipper in the left side seam.
Waist: Separate interfaced belt fastened with two hooks, topstitched onto a trim with a box pleat.
Finishing: Seams serged; hem hand-sewn with blind stitches.
Level Of Difficulty
Intermediate. A faced square neckline with bands and a stand collar, a lapped back vent, an invisible zipper and a pleated belt.
Fabric Recommendations
Thin, drapey suiting fabrics of natural or blended fibres.
Additional Supplies
- Invisible zipper
- Thin woven fusible interfacing (stand collar, neckline bands, front facing, cuffs, belt, belt trim)
- 2 hooks and eyes
Cutter's Must
From main fabric:
- Upper back - 2 pieces
- Lower back - 2 pieces
- Center upper front – 1 piece
- Side upper front – 2 pieces
- Front Yoke - 2 pieces
- Front Placket - 4 pieces
- Lower front - 1 piece
- Collar Stand – 2 pieces
- Front facing – 1 piece
- Sleeve - 2 pieces
- Cuff - 2 pieces
- Belt – 1 piece
- Belt Trim – 1 piece
From fusible interfacing:
- Collar Stand — 1 piece
- Front Placket — 2 pieces
- Front facing – 1 piece
- Cuff - 2 pieces
- Belt – 1 piece
- Belt Trim – 1 piece
Sewing Instructions
- Fuse fusible interfacing to the designated pieces.
- Stitch darts on back pieces. Press darts towards the center seam. Stitch upper and lower back PANELs. Press seam down and serge.
- On the left lower back, cut 5 cm along the vertical slit edge. On both lower back pieces, fuse the slit from the wrong side. On the right side, mark the center seam line (slit fold line). Press the left along the slit fold line, on the right, press only the right slit seam allowance (6 cm) to the wrong side. Align pieces along the center seam and secure at the upper slit edge. Serge the center back edge separately on each piece. Serge the slit seam allowances. Stitch the center back edge from the neckline to the slit corner. Clip the slit seam allowance corner on the right. Press center seam seam allowances open, press slit seam allowances and secure them on the right side with machine stitching.
- Stitch darts on front pieces. Press darts towards the center. Trim bust dart depth to 1 cm and serge.
- Serge the lower edge of the front facing. Place the front facing with the center upper front, right sides together, and stitch the upper edge. Clip seam allowances at curves, turn facing to the wrong side, straighten, and press.
- Place front plackets right sides together and stitch the neckline edge, inserting the center front between them. Clip seam allowances at curves, turn pieces to the right side, straighten, and press. Secure plackets along the raw edges and treat as one piece. Stitch the front placket to the yoke, press seam allowances towards the yoke and serge.
- Stitch the side upper front to the center, press seam allowances towards the side and serge.
- Stitch the upper and lower front PANELs. Press seam allowances down and serge.
- Serge the left side edges separately. Stitch the left side seam from the armhole to the first notch and from the second notch to the bottom. Press seam allowances open, insert the zipper. Stitch the right side seam, press seam allowances towards the back and serge.
- Place Collar Stand pieces right sides together and stitch the upper edge. Clip seam allowances, turn pieces to the right side and press.
- Press the lower seam allowance of the inner Collar Stand to the wrong side. Stitch the outer Collar Stand into the back neckline, clip seam allowances and press towards the Collar Stand.
- Stitch shoulder edges, wrapping the front placket with the inner Collar Stand. Press seam allowances towards the back, serge. Turn pieces to the right side. Topstitch the inner Collar Stand into the seam of the outer Collar Stand.
- Stitch the sleeve edge. Press seam allowances and serge. Set sleeves into the armhole, aligning notches and easing the cap. Press seam allowances and serge.
- Fold the cuff right sides together into a loop and stitch the short edge, press seam allowances open. Fold the cuff in half lengthwise, right side out, insert the cuff into the sleeve and stitch to the lower edge. Serge seam allowances. Turn the cuff to the right side.
- Serge the hem seam allowance of the dress, press to the wrong side and hem with blind stitches. Attach the slit seam allowance to the hem.
- Fold the belt lengthwise, right sides together, and stitch along three sides, inserting hooks into one of the short sides, and leaving an opening in the long side for turning. Turn the belt to the right side, straighten, and press. Close the opening.
- Fold the belt trim lengthwise, right sides together, and stitch, leaving an opening in the long side for turning. Turn the trim to the right side, straighten, and press. Close the opening. Form a box pleat according to the markings.
- Place the belt on the trim and topstitch. Adjust the belt length and sew loops for the hooks.