Asymmetrical Front Blouse Wide Collar
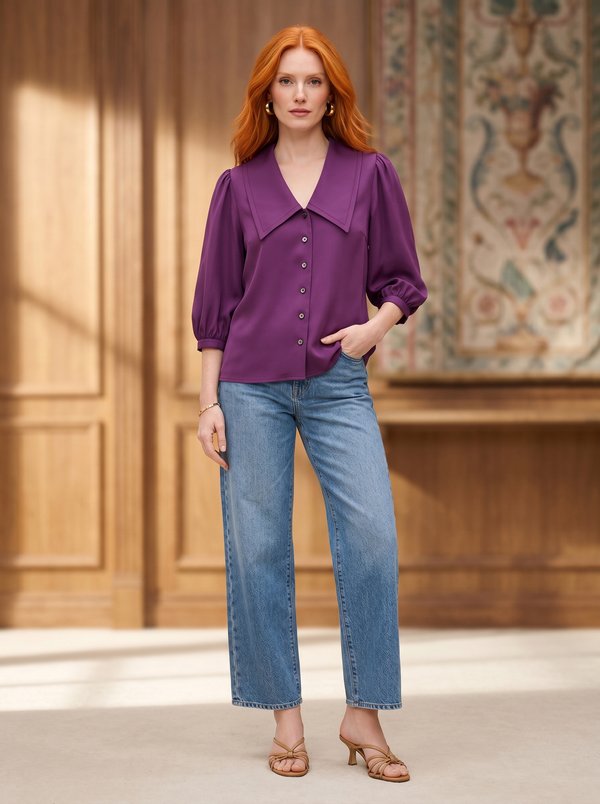
A women's fitted, hip-length blouse with an off-centre vertical front seam trimmed with a row of buttons, a wide collar on a stand, an asymmetric faced hem and full long sleeves pleated into buttoned cuffs. It closes with a concealed zipper at the centre back and two rouleau loops at the neck.
When To Wear
- For the office with straight skirts or trousers, worn outside the waistband to show the shaped hem.
- In autumn and spring for dinners and occasions, on its own or under a cropped jacket.
Key Design Features
Silhouette: Fitted, with princess seams on the back and on the right front, and a bust dart on the left front.
Collar: Wide interfaced collar on a stand, with a rouleau loop set into the stand.
Front: Three panels. The left side front is joined to the centre front by an off-centre vertical seam lined with buttons; the seam is open just below the neckline, where it fastens with a second rouleau loop, and opens again into the angled hem.
Closure: Concealed zipper in the centre back seam.
Sleeves: Long set-in sleeves with a slit at the lower edge and loose pleats laid along it, set into interfaced cuffs with buttons and buttonholes.
Back: Centre back seam with the zipper and two princess seams.
Finishing: Neckline and front opening finished with interfaced facings; the hem and the angled front edges are finished with interfaced hem facings instead of a turned hem.
Level Of Difficulty
Advanced. Asymmetric front panels joined between marks, a concealed zipper, rouleau loops, a collar on a stand, shaped neckline and hem facings, and pleated sleeves with cuffs.
Fabric Recommendations
Blouse fabrics of natural or blended fibres.
Additional Supplies
- Fusible interfacing (collar, collar stand, cuffs, neckline and hem facings)
- Concealed zipper
- 19 buttons
Cutter's Must
If the patterns have a double contour, seam allowances are included. If the contour is single, seam allowances are not included. Seam allowances: all seams 1 cm; hem allowance – 1.5 cm. Attention! First, print out the paper patterns and lay them out on the fabric width (fabric width can be from 90cm to 150cm) to determine how much material you will need (don't forget to account for paired and symmetrical pieces). When stitching pieces, pay attention to the notches - they must match!
- From main fabric:
- Center back - 2 pieces
- Side back - 2 pieces
- Right side front - 1 piece
- Center front - 1 piece
- Left side front - 1 piece
- Collar stand — 2 pieces
- Collar – 2 pieces
- Sleeve — 2 pieces
- Cuff — 2 pieces
- Back neckline facing – 1 piece
- Right front neckline facing – 1 piece
- Left front neckline facing – 1 piece
- Back hem facing – 1 piece
- Right front hem facing – 1 piece
- Left front hem facing – 1 piece
- From fusible interfacing:
- Collar stand — 1 piece
- Collar – 1 piece
- Cuff – 2 pieces
- Back neckline facing – 1 piece
- Right front neckline facing – 1 piece
- Left front neckline facing – 1 piece
- Back hem facing – 1 piece
- Right front hem facing – 1 piece
- Left front hem facing – 1 piece
Sewing Instructions
- Fuse interfacing to the designated pieces.
- Finish the raw edges of the center back pieces separately. Stitch the center back seam from the neckline edge to the first mark and from the second mark to the bottom edge, press seam allowances open. Insert the concealed zipper.
- Stitch the back princess seams, press seam allowances towards the center, and finish the raw edges.
- Stitch the bust dart on the left side front piece, press the dart depth upwards. Stitch the right front princess seam, press seam allowances towards the center, and finish the raw edges.
- Finish the vertical raw edges of the left side front and center front pieces separately. Attach the left side front piece to the center front between the marks. Clip the seam allowances at the marks, press the seam open.
- Stitch the shoulder seams, press seam allowances towards the back, and finish the raw edges.
- Cut a bias strip 2.5 cm wide and 15 cm long for the loop fasteners. Fold the strip in half lengthwise, right sides together, and stitch 0.3 cm from the fold. Trim seam allowances close to the stitching, turn the strip right side out and shape the rouleau. Cut into two parts and adjust loop lengths.
- Place collar pieces right sides together, stitch the ends and the outer edge. Trim seams, turn the collar right side out, shape and press. Place collar stand pieces right sides together, insert the finished collar between them, align notches and stitch, simultaneously stitching the ends of the stand and inserting the loop fastener. Turn the finished collar right side out and press. Attach the collar to the neckline.
- Stitch the shoulder seams of the back and front neckline facings, press seam allowances open. Finish the outer edge. Place the facing on the right side of the garment and stitch the neckline and of the vertical seam of the center front piece, inserting the loop fastener. Clip seam allowances, turn the facing to the wrong side and press. Stitch the facing to the shoulder seam allowances.
- Stitch the side seams, press seam allowances towards the back, and finish the raw edges.
- Finish the sleeve seams separately. Stitch the sleeve seam from the top to the slit mark, press seam allowances open. Stitch a reinforcing line along the slit. Set the sleeves into the armholes, press seam allowances and finish the raw edges. Create and secure arbitrary pleats at the lower edge of the sleeve.
- Place the cuff piece right sides together and stitch the side edges. Start and end stitching precisely at the marked seam line for attaching the cuff. Trim seam allowances. Turn the piece right side out, press. Attach the outer side of the cuff to the sleeve, fold the seam allowance of the inner side of the cuff inwards and topstitch into the seam of attaching the outer cuff.
- Stitch the side seams of the hem facings, press seam allowances open. Finish the outer edge. Place the facing on the right side of the garment and stitch the bottom edge and the bias edges of the front seam. Clip seam allowances, turn the facing to the wrong side and press. Stitch the facing to the side seam allowances.
- Sew buttons corresponding to the loop fasteners and on the vertical front seam. Make buttonholes and sew buttons on the cuffs.