Professional made-to-measure digital sewing patterns — PDF · PLT · DXF AAMA

Minervainervabeta
#6142
#6144

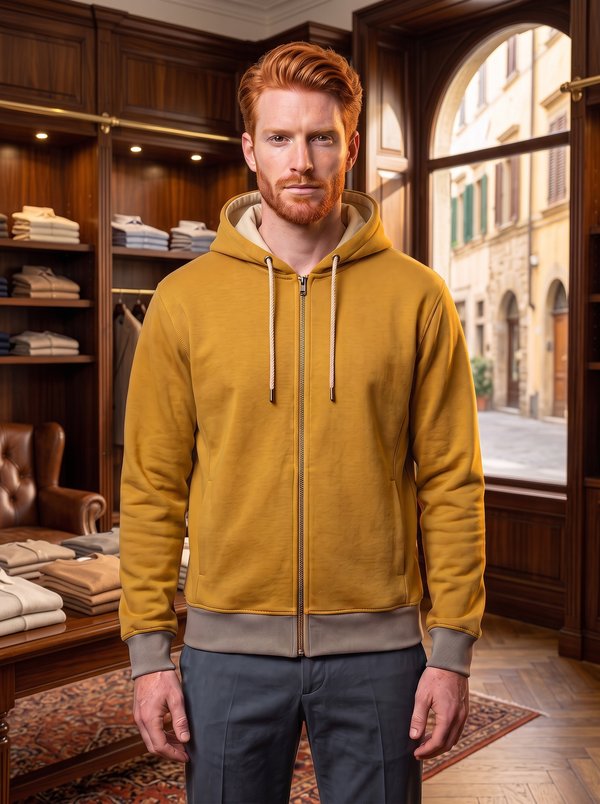
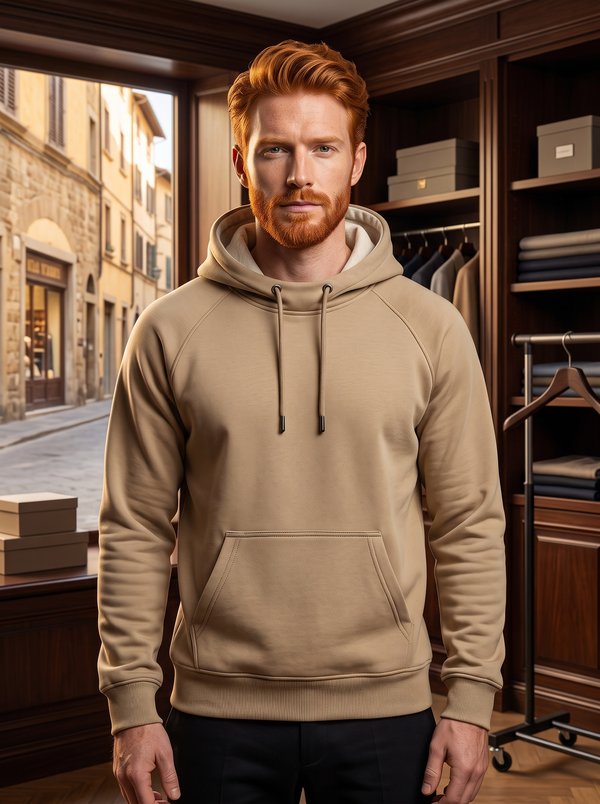
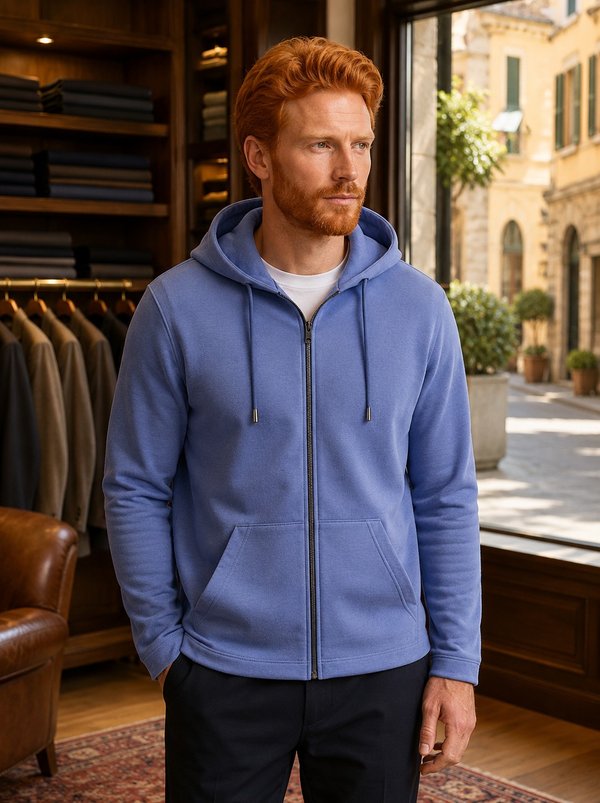
Drawstring Cowl Neck Raglan Sleeve Hoodie

Pattern #6143

A men's (unisex) hip-length pullover hoodie for knit fabric with raglan sleeves, a double-layer hood that wraps across the front with a drawcord, curved front panel seams with welt pockets, and a band at the hem and cuffs. Drafted to your own measurements. Recommended fabric: knit fabric with low stretch, in natural or blended fibres.

Tech. Description

Hooded Sweatshirt

A men's (unisex) hip-length pullover hoodie for knit fabric with raglan sleeves, a double-layer hood that wraps across the front with a drawcord, curved front panel seams with welt pockets, and a band at the hem and cuffs.

When To Wear

  • Over a T-shirt for everyday wear and weekends in spring and autumn.
  • Outdoors in wind: the hood overlaps at the front and closes around the neck with the cord.

Key Design Features

Silhouette: Straight body drawn in by the hem band.

Length: Hip length.

Neckline: Two-layer hood, each layer of two pieces; the right side overlaps the left at the front and is joined at the lower edge before setting into the neckline. A topstitched casing along the front edge carries a cord through two eyelets.

Sleeves: Raglan sleeves with a shoulder yoke sewn to the top of each sleeve; the sleeve seams are sewn in one line with the side seams; folded cuffs stretched onto the hems.

Front: Pullover, no opening. A centre front cut on the fold and two side fronts joined by curved seams.

Pockets: Vertical welt pockets set into the curved front seams, the welt ends topstitched to the side fronts.

Back: One piece cut on the fold.

Finishing: Seams overlocked; folded hem band stretched onto the lower edge. Ready-made rib cuffs and band can be used instead of the self-fabric ones.

Level Of Difficulty

Intermediate. Welt pockets set into curved panel seams and an overlapping two-layer hood with a casing; the rest is straight knit seaming on an overlocker or with a stretch stitch.

Fabric Recommendations

Knit fabric with low stretch, in natural or blended fibres.

Additional Supplies

  • 2 eyelets
  • 2 decorative cord ends
  • Decorative cord
  • Ready-made rib cuffs and hem band (optional)

Cutter’s Must

From Main Fabric:

  1. Back – 1 piece on fold
  2. Center front – 1 piece on fold
  3. Side front – 2 pieces
  4. Yoke – 2 pieces
  5. Hood – 4 pieces
  6. Offset Welt – 2 pieces
  7. Sleeve – 2 pieces
  8. Cuff – 2 pieces
  9. Hem band (marked on pattern as Placket) – 1 piece on fold
  10. Pocket bag – 4 pieces

Important Information

Before cutting your fabric:

  • Print and lay out pattern pieces to determine yardage.
  • Check mirrored pieces, notches, and grainlines.
  • For patterned fabrics, align carefully for symmetry.

Assembly Instructions

1. Pocket Welt

  • Fold the welt piece lengthwise, right sides together, and stitch across the short ends.
  • Trim seam allowances at the corners, turn the welt right side out, shape the corners neatly, and press.
  • Attach the pocket bag to the welt.

2. Pocket Assembly

  • Place the pocket bag on the side front panel, right sides together.
  • On the center front panel, place the pocket bag with the attached welt, right sides together, aligning notches.
  • Stitch the pocket bag to the pocket opening seam allowance.

Press the seam allowance of the side front panel over the pocket bag and topstitch it to secure.

3. Front Side Seams and Welt Finishing

  • Join the front side seams, stitching through all layers including the pocket bags.
  • Press seam allowances toward the center and overlock.

Topstitch the short ends of the welt to the side front panel to secure.

4. Sleeve Yoke

Stitch the yoke to the sleeve, press seam allowances toward the yoke, and overlock.

5. Sleeve and Body Assembly

  • Attach the sleeves to the back; press seam allowances toward the back and overlock.
  • Attach the sleeves to the front; press seam allowances toward the front and overlock.

6. Side and Sleeve Seams

  • Stitch the side seams together with the sleeve seams in one continuous line.
  • Press seam allowances and overlock.

7. Hood

  • Stitch the hood pieces in pairs.
  • On the outer hood, set the eyelets at the marked positions.
  • Place the two hoods right sides together and stitch around the outer edge.
  • Clip seam allowances along curved areas, turn right side out, shape, and press.
  • Topstitch along the marked line to form a drawstring casing.
  • Overlap the right hood over the left and baste or stitch together along the lower edge.

8. Attach Hood

  • Sew the hood into the neckline.
  • Press seam allowances upward and overlock.

9. Cuffs

  • Stitch each cuff into a ring and press seam allowances open.
  • Fold the cuff in half lengthwise, wrong sides together, and press.
  • Attach the cuff to the sleeve hem, slightly stretching it to match.
  • Press seam allowances upward and overlock.

10. Lower Band

  • Stitch the lower band into a ring and press seam allowances open.
  • Fold the band in half lengthwise, wrong sides together, and press.
  • Attach the band to the garment’s lower edge, stretching it evenly.
  • Press seam allowances upward and overlock.

11. Finishing

Thread the drawstring through the hood casing and secure the eyelets.

Tip: Ready-made ribbed cuffs and waistband can also be used instead of self-fabric pieces.
Features

Order Pattern

Standard Sizes

Individual Measurements

Please double-check the file format and paper size. Your pattern is drafted in exactly the format you select; a different format or paper size later is a new order.

Similar patterns

View all
Support

Minerva Support

Online
Support
Hi! I'm Minerva's AI assistant. What can I help you with?