Professional made-to-measure digital sewing patterns — PDF · PLT · DXF AAMA
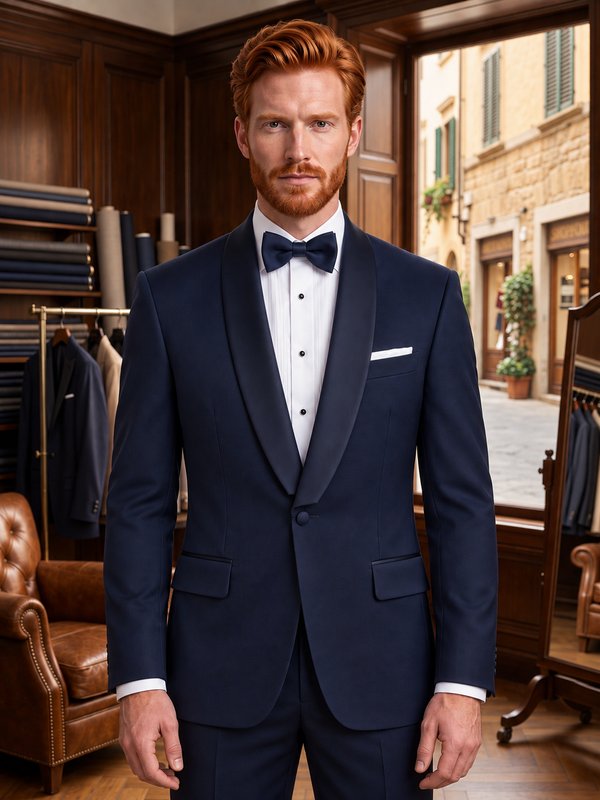
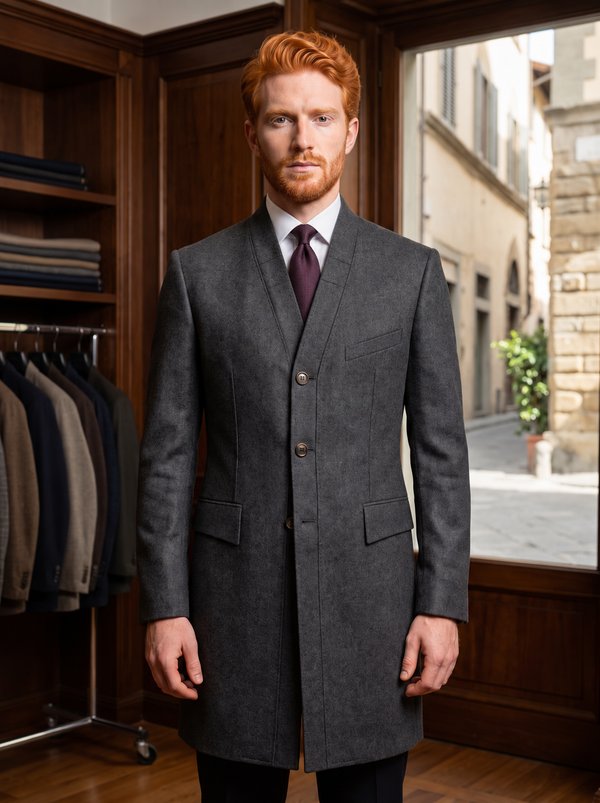
A men's single-breasted dinner jacket with a shawl collar cut in one with the fronts, a two-button front, a chest welt pocket and flapped hip pockets. Centre back vent, vented two-piece sleeves and a full lining. Drafted to your own measurements. Recommended fabric: wool suiting with a smooth surface, such as barathea or fine worsted, in black or midnight blue.
A men's single-breasted dinner jacket with a shawl collar cut in one with the fronts, a two-button front, a chest welt pocket and flapped hip pockets. Centre back vent, vented two-piece sleeves and a full lining.
Silhouette: Shaped by front darts and side panels between front and back; padded shoulders.
Length: Hip length, with rounded front edges at the hem.
Collar: Shawl collar cut in one with the fronts, joined at the centre back; the facings form the upper side of the collar and are joined at the centre back in the same way.
Sleeves: Two-piece set-in sleeves with eased caps and sleeve heads; vents with mitred corners, hem and vent allowances catch-stitched by hand.
Front: Single-breasted, two buttons, buttonholes on the left front; separate front facings.
Pockets: Single-welt chest pocket on the left front; hip pockets with a flap and a 1 cm welt below it on both fronts.
Back: Centre back seam with a vent lapped to the left.
Finishing: Fusible interfacing on the fronts, facings, flaps, half the chest welt and the hem allowances; darts slashed and pressed open; facings tacked at the shoulder seams; shoulder pads.
Lining: Full lining with a 2 cm ease pleat at the centre back, 2 cm shorter than the jacket, sewn around the vents; the jacket is turned through an opening in a sleeve lining seam.
Advanced. A cut-on shawl collar with a centre back seam, a flapped welt pocket and a chest welt pocket, a lined back vent, mitred sleeve vents and a bagged lining.
Wool suiting with a smooth surface, such as barathea or fine worsted, in black or midnight blue. The facings, which form the visible side of the shawl collar, can be cut from silk satin.
From Main Fabric:
From Lining Fabric:
For drafting the lining patterns, use the following patterns with the following modifications:
From Fusible Interfacing:
For drafting fusible interfacing patterns, use the following patterns:
Before cutting your fabric:
1. Fuse Interfacing
From the wrong side, apply fusible interfacing to the Fronts, Center Front Facings, half the height of the Chest Welt, and the hem and sleeve hems.
2. Mark all notches, dart points, and vent lines clearly.
3. Slash the lower pocket opening, stitch and press open the dart; baste the pocket opening.
4. Single-Welt Breast Pocket (Left Front)
5. Pocket Flaps
6. Welt Hip Pocket with Flap
7. Repeat the process for the right-side pocket.
8. Join center back seam to the top of the vent.
9. Turn the left vent facing to the right side along the hem allowance; stitch along the hem foldline and turn right side out.
10. Turn the hem allowance of the right back to the right side along the vent facing edge; stitch and turn.
11. Lay the vent to the left side and secure at the upper edge with a diagonal reinforcement stitch.
12. Join sides to fronts; press allowances open.
13. Join back side seams; press allowances open.
14. Stitch shoulder seams.
15. Join center back shawl collar seams of fronts and center front facings.
16. Attach back neckline of front shawl collar to back neckline.
16. With right sides together, join Center Front Facings to jacket fronts along lapel and collar edges.
17. Clip curves, grade seams, and understitch where possible (especially along front edges).
18. Turn center front facings to inside, push edges out neatly, and press along the roll line to form the shawl collar curve.
19. Two-Piece Sleeve with Vent
20. Sleeve Cap
21. Hand-stitch sleeve-head wadding along the sleeve caps.
22. Sew in shoulder pads.
23. Assemble lining body in the same sequence as outer jacket: join center back, sides, and shoulders.
24. Stitch sleeves lining, leaving a small opening at one sleeve seam for turning. Set lining sleeves in.
25. Attach lining fronts to front facings and back lining to back neckline of shawl collar.
26. Attach lining to hem, sleeve hems, and vents.
27. Turn jacket right side out through the sleeve opening.
28. Close lining opening with machine or hand slipstitch.
29. Work two front buttonholes on the left front; sew two buttons on the right front.
30. Tack facings at shoulder seams and under pocket ends to prevent rolling.
31. Final press: shape the shawl collar on a tailor’s ham with steam and a pressing cloth; allow to cool before handling.
Ease
Finished garment circumference minus your body measurement, measured on the pattern at underarm and waist level.
Ready now, no waiting: PDF A0, A4, US Letter, One Page and Projector files with seam allowances, plus the sewing booklet with fabric requirements — in one ZIP.
Body measurements the sizes are drafted for
| Size | Height | Chest | Waist | Hip |
|---|---|---|---|---|
| M | 178 cm70″ | 100 cm39″ | 85 cm33.5″ | 100 cm39″ |
| L | 183 cm72″ | 107 cm42″ | 92 cm36.2″ | 107 cm42″ |
| XL | 188 cm74″ | 112 cm44″ | 99 cm39.0″ | 113 cm44″ |
Prefer a pattern drafted to your own measurements? Order it below.

Minerva Support
Online