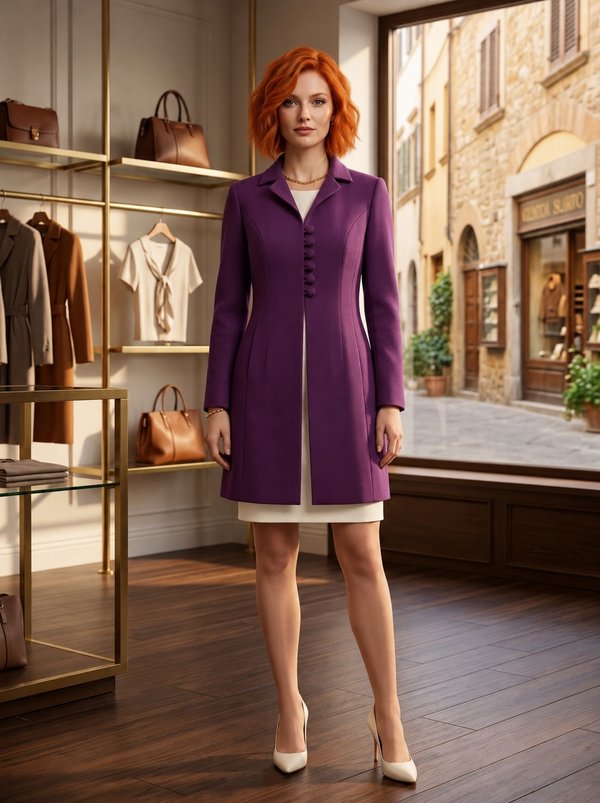
Single-Breasted Blazer
A women's hip-length single-breasted jacket in raincoat fabric, with princess seams front and back, a notched collar, two-piece sleeves and vertical welt pockets set into the front princess seams. Fully lined.
When To Wear
- As a light outer layer in spring and autumn, over a shirt or fine knit.
- With trousers or a straight skirt for work.
Key Design Features
Silhouette: Semi-fitted, shaped by princess seams on the front and back, darts and a centre back seam.
Length: Hip length.
Collar: Notched collar with lapels; the collar is stitched along its ends and outer edge, turned and set into the neckline, the lapels faced by the front facings.
Sleeves: Two-piece set-in sleeves (upper and lower sleeve), with shoulder pads.
Closure: Single-breasted, four 20 mm buttons.
Pockets: Vertical welt pockets in the seam between the centre front and side front; welts topstitched 1.0 cm from the edges and stitched down at the short ends.
Back: Centre back seam and princess seams.
Lining: Full lining attached to the facings, with an ease pleat at the hem; the jacket is turned through a 20 cm opening in a sleeve lining seam.
Level Of Difficulty
Intermediate. In-seam welt pockets, two-piece set-in sleeves, a notched collar and bagging out a full lining.
Fabric Recommendations
Raincoat fabrics or coated fabrics.
Additional Supplies
- Matching lining fabric
- 4 buttons, 20 mm diameter
- 6 buttons, 12 mm diameter
- Shoulder pads
Cutter's Must
- From main fabric:
- Center Front – 2 pieces
- Side Front – 2 pieces
- Center Back – 2 pieces
- Side Back – 2 pieces
- Upper Sleeve – 2 pieces
- Lower Sleeve – 2 pieces
- Lower Collar – 2 pieces
- Center Front Facing – 2 pieces
- Off-Set Welt – 2 pieces
- From lining fabric:
- Center Back – 2 pieces
- Center Front – 2 pieces
- Side Back – 2 pieces
- Side Front – 2 pieces
- Upper Sleeve – 2 pieces
- Lower Sleeve – 2 pieces
- Pocket Bag – 4 pieces
Sewing Instructions
- Stitch the center back seam, the darts, and the princess seams of the back. On the front, the princess seams are stitched later, leaving the pocket openings free.
- Fold each Off-Set Welt right sides together, stitch across the short ends, turn right side out and press the folds.
- Topstitch along the edges of the welt 1.0 cm from the edge.
- Place the welt on the right side of the Center Front, matching its raw edges with the princess seam edge and its upper end with the notch; place one Pocket Bag on top of the welt and baste all layers together.
- Place a second Pocket Bag on the right side of the Side Front at the pocket opening.
- Stitch on the welt and pocket bags.
- Stitch the front princess seams (Center Front to Side Front).
- Turn the pocket bags to the inside, even them out and stitch them together.
- Stitch the short ends of the welts to the front over the previous topstitching line.
- Stitch the side seams of the jacket.
- Stitch the shoulder seams.
- Place the two collar pieces right sides together, stitch along the ends and the outer edge, turn right side out and press.
- Place the collar on the neckline, right sides together, matching the markings, and baste.
- Stitch the sleeve seams (Upper Sleeve to Lower Sleeve) and press open.
- Set the sleeves into the armholes, matching the markings.
- Press the sleeve hem allowance to the inside.
- Attach the shoulder pads.
- Assemble the lining pieces in the same way as the jacket, leaving about 20 cm of the elbow seam of one lining sleeve unstitched.
- Stitch the Center Front Facings to the lining.
- Place the lining and the jacket right sides together, matching the center back and the shoulder seams.
- Stitch the lining (with facings) to the jacket along the front edges and the neckline.
- Form an ease pleat in the lining at the lower edge and stitch the lining to the raw edge of the jacket hem allowance.
- Turn the jacket right side out through the opening in the sleeve lining, then stitch the opening closed.
- Neatly hand stitch the lower edge of the sleeve lining to the sleeve hem.
- Make buttonholes on the right front as marked and sew on the buttons.