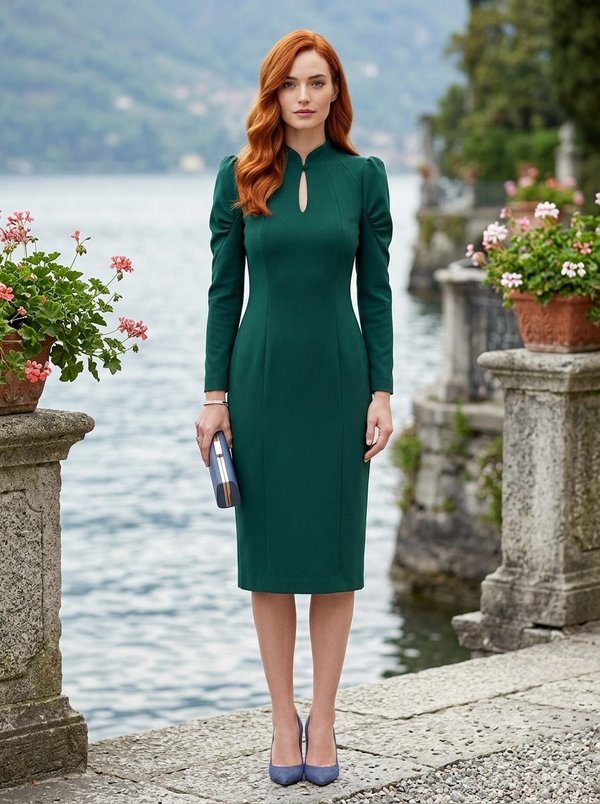
Piped Long Sleeve Sheath Dress
A women's fitted knee-length sheath dress with a separate waistband, princess-seamed bodice, shoulder yokes and long sleeves with a lengthwise insert. Decorative piping is set into the princess seams, the yoke seams, both waistband seams and the sleeve inserts.
When To Wear
- At the office and for business meetings, in autumn and winter.
- For dinners and daytime events, with court shoes.
Key Design Features
Silhouette: Fitted sheath; upper part shaped with princess seams front and back, skirt part shaped with darts.
Length: Knee length.
Neckline: Round neckline finished with a facing, with a keyhole slit at the centre front; the upper corners above the slit are joined.
Sleeves: Long set-in sleeves, each made of a front part, a back part and a narrow insert between them, with piping in both insert seams.
Back: Centre back seam with an invisible zipper at the top.
Waist: Shaped waistband (one front piece, two back pieces), piped along its upper and lower seams.
Finishing: Narrow yoke strips over the shoulders, piped on both sides; hem and sleeve hems turned up 2 cm and topstitched.
Level Of Difficulty
Intermediate. Inserting piping evenly into curved princess seams, waistband and sleeve seams, matching the piping lines at the seams, a faced keyhole slit and an invisible zipper.
Fabric Recommendations
Dress fabrics of natural or blended fibres.
Additional Supplies
- Fusible interfacing (neckline facings)
- Invisible zipper
- Decorative piping (approximate length is given on the upper front pattern piece)
Cutter's Must
- From main fabric:
- Center back - 2 pieces
- Side back – 2 pieces
- Back waistband – 2 pieces
- Lower back – 2 pieces
- Center front - 1 piece on fold
- Side front - 2 pieces
- Front waistband - 1 piece
- Lower front - 1 piece on fold
- Front sleeve — 2 pieces
- Back sleeve – 2 pieces
- Sleeve insert – 2 pieces
- Front neckline facing — 1 piece
- Back neckline facing — 2 pieces
- Yoke – 2 pieces
- From fusible interfacing:
- Front neckline facing — 1 piece
- Back neckline facing — 2 pieces
Sewing Instructions
- Fuse interfacing to the designated pieces.
- Stitch the princess seams of the upper back, inserting decorative piping, press seam allowances towards the center, serge.
- Stitch the princess seams of the upper front, inserting decorative piping, press seam allowances towards the center and serge.
- Stitch the side seams of the upper dress parts. Serge seam allowances and press towards the back.
- Attach the yoke to the shoulder seams of the front and back, inserting decorative piping. Serge seam allowances and press towards the yoke.
- Stitch the side seams of the waistbands. Serge seam allowances and press towards the back. Attach the waistband to the upper of the dress, inserting decorative piping, press seam allowances towards the waistband, serge.
- Stitch the darts on the lower front and back parts, press depths towards the center. Stitch the side seams of the lower dress parts. Serge seam allowances and press towards the back.
- Attach the lower dress to the waistband, inserting decorative piping. Press seam allowances upwards and serge.
- Serge the center back edges separately. Stitch the center back seam from the zipper mark to the bottom, press seam allowances open. Insert the zipper.
- Stitch the shoulder seams of the neckline facings, press seam allowances open. Serge the outer edge. Place the facing on the garment right sides together. Slash the front and front facing along the marked line. Stitch the front slit at 0.5 cm, gradually tapering to nothing. Slash seam allowances and the corner on the front. Stitch the neckline with the facing, slash seam allowances. Turn the facing to the wrong side and press. Secure the upper corners of the front flush. Secure the facing to the main garment at the shoulder seams and zipper tape.
- Attach the sleeve parts to the insert, inserting decorative piping. Serge seam allowances and press towards the insert. Stitch the sleeve seams, press seam allowances towards the back and serge. Set in the sleeves into the armholes, press seam allowances and serge.
- Serge the bottom edge of the garment and sleeves, press to the wrong side and topstitch.