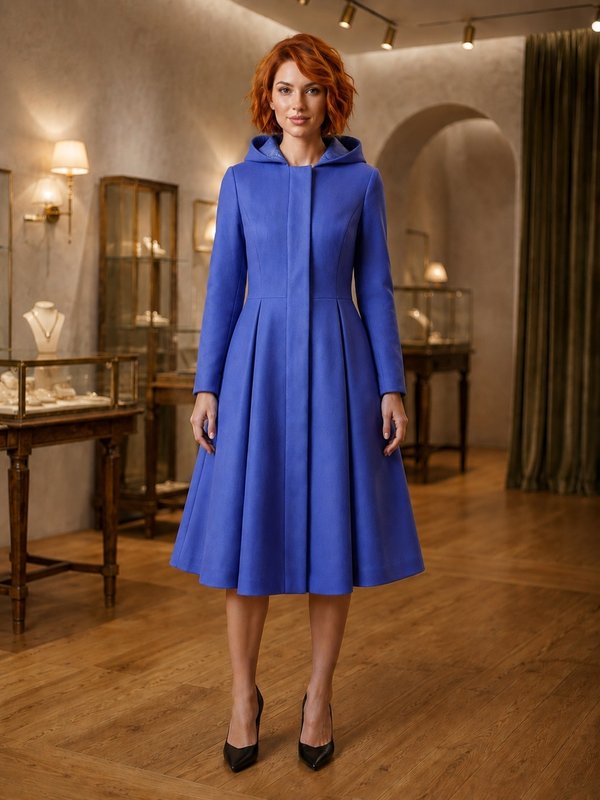
Notched Lapel Wrap Front Coat Dress
A women's knee-length coat dress with a notched collar, a one-button wrap front and a horizontal waist seam. Darts shape the front and back, and the two-piece sleeves end below the elbow.
When To Wear
- Office and business wear in spring and early autumn.
- Daytime events, worn on its own as a dress.
Key Design Features
Silhouette: Fitted, with a waist seam on the front and back and darts on the upper and lower pieces.
Length: Just above the knee.
Collar: Notched collar with lapels; the undercollar is set into the neckline and the upper collar into the facings. A 1 cm stay tape runs along the lapel roll line.
Closure: The right front wraps over the left and fastens with one button at the waist. The buttonhole is left open in the waist seam of the front and facing; an inner button and buttonhole hold the left front.
Sleeves: Two-piece set-in sleeves with elbow and front seams; three-quarter length in the photo. Shoulder pads.
Back: Centre back seam, waist seam and darts.
Finishing: Front edge seam allowance understitched 0.2 cm from the seam (onto the facing along the closure, onto the front along the lapels). Hem and sleeve hems with a 3 cm allowance, slip-stitched by hand.
Level Of Difficulty
Advanced. A notched collar with taped roll line, a buttonhole formed in a seam through both the front and the facing, two-piece sleeves with an eased cap.
Fabric Recommendations
Fine suiting fabrics of natural or blended fibres.
Additional Supplies
- Fusible interfacing (collar, facings, back neck facing, lapel stay tape)
- 1 button
- 1 inner button
- Shoulder pads
Cutter's Must
When stitching pieces, pay attention to the notches - they must match!
From main fabric:
- Upper back – 2 pieces
- Lower back – 2 pieces
- Upper front – 2 pieces
- Lower front – 2 pieces
- Upper sleeve – 2 pieces
- Lower sleeve – 2 pieces
- Collar - 2 pieces
- Left facing – 1 piece
- Upper right facing – 1 piece
- Lower right facing – 1 piece
- Back neckline facing – 1 piece
From fusible interfacing:
- Collar - 1 piece
- Left facing – 1 piece
- Upper right facing – 1 piece
- Lower right facing – 1 piece
- Back neckline facing – 1 piece
Sewing Instructions
- Interface the pieces with fusible interfacing. Along the lapel fold line on the front piece, apply a 1 cm wide grainline strip (from fusible interfacing).
- Stitch the darts on the back pieces, press the dart intakes towards the center. Stitch the upper and lower back parts, press allowances upwards and overlock. Stitch the center back seam, press allowances to the left side and overlock.
- Stitch the darts on the front pieces, press the dart intakes towards the center. Stitch the left upper and lower front parts, press allowances upwards and overlock. Stitch the right upper and lower front parts from the edge of the front opening to the buttonhole mark and from the buttonhole mark to the side seam. Press allowances open, overlock.
- Stitch the shoulder and side seams, press allowances towards the back and overlock.
- Fold the collar pieces right sides together and stitch along the ends and outer edge. Start and end the stitching strictly at the marked collar attachment seam line. Trim seams at corners. Turn the collar right side out, shape, and press.
- Stitch the upper and lower parts of the right facing from the edge of the front opening to the buttonhole mark and from the buttonhole mark to the inner edge, press allowances open. Stitch and press open the shoulder seams of the back neckline facing and facings. Overlock the outer edge.
- Place the facing on the right side of the front piece, right side down, pin and stitch along the front opening and bottom. Stitch upwards to the notch indicating the end of the collar attachment. Trim the seams of the upper and lower front opening corners. Topstitch the seam allowance of the front opening: in the buttoning area – onto the facing, in the lapel area – onto the front piece. Position the stitching 0.2 cm from the seam. Turn the front openings right side out, shape the seams. Secure the allowances of the front piece and facings, forming a buttonhole.
- Stitch the undercollar into the garment neckline, and the upper collar into the neckline edge of the back facing and facings.
- Stitch the elbow seam of the sleeve, press allowances and overlock. Stitch the front seam of the sleeve, press allowances and overlock.
- Set the sleeves into the armholes according to the notches, easing the sleeve cap, press allowances and overlock. Insert shoulder pads.
- Overlock the bottom of the garment and sleeve hem, press to the wrong side and hem with blind stitches.
- Sew on the button corresponding to the buttonhole. On the left front piece, make the inner buttonhole, sew on the inner button.