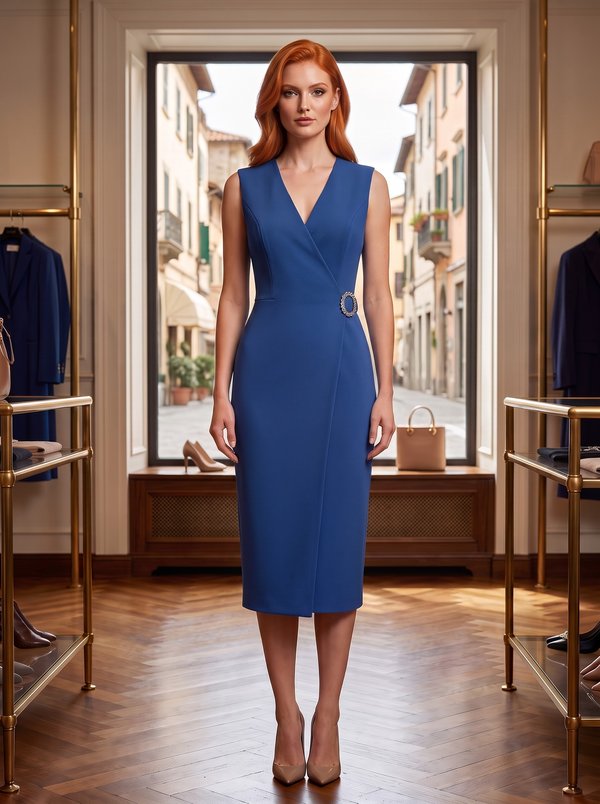
Asymmetrical Button Front Sleeveless A-line Dress
A sleeveless women's A-line dress with a separate waistband, an off-centre front closure with a concealed (fly) buttonhole placket, and a wide neckline finished with a visible band.
When To Wear
- On its own in warm weather, for the office or daytime events.
- Over a fine blouse or a thin knit top, or under a cardigan or jacket in cooler months.
Key Design Features
Silhouette: Fitted bodice shaped with bust and waist darts, flaring into an A-line skirt.
Length: Just above the knee.
Neckline: Wide round neckline edged with a band made from shaped neckline facings, with matching inner facings.
Sleeves: Sleeveless; armholes bound with a 4 cm bias strip folded in half and topstitched along the fold.
Closure: Off-centre front opening running from the neckline down into the skirt. The buttonholes are worked in a framed slit on the right front facing, so they stay hidden; the fly is held by topstitching on the right front, and the buttons are sewn on the left front. Bar tacks sit between each pair of buttonholes.
Waist: Separate waistband on the front (right and left pieces) and on the back.
Back: Upper back in two pieces with a centre back seam and darts; lower back cut in one piece.
Finishing: Hem allowance 2.5 cm.
Level Of Difficulty
Intermediate. A concealed buttonhole placket worked through a framed slit in the facing, an asymmetric front edge, a banded neckline with facings and bias-bound armholes.
Fabric Recommendations
Dress fabrics from natural or blended fibres.
Additional Supplies
- Fusible interfacing (neckline facings, front facings)
- Lining fabric (for the fly placket)
- 9 buttons
Cutter's Must
- From main fabric:
- Upper back – 2 pieces
- Back waistband - 1 piece
- Lower back - 1 piece
- Lower right front – 1 piece
- Lower left front – 1 piece
- Right front waistband - 1 piece
- Left front waistband - 1 piece
- Upper right front - 1 piece
- Upper left front - 1 piece
- Back neckline facing - 2 pieces
- Right front neckline facing - 2 pieces
- Left front neckline facing - 2 pieces
- Front facing - 2 pieces
- From lining fabric:
- Fly front lining – 2 pieces
- From fusible interlining:
- Back neckline facing - 1 piece
- Right front neckline facing - 1 piece
- Left front neckline facing - 1 piece
- Front facing - 2 pieces
Sewing Instructions
- Fuse interlining to the designated pieces.
- Stitch darts on back and front pieces, press waist dart depths towards the center of the pieces, bust darts upwards.
- Stitch the center seam on the upper back, press seam allowances to the left side and overlock.
- Attach the back neckline facing to the upper back, press seam allowances towards the facing. Attach the back waistband to the upper back, press seam allowances towards the waistband and overlock. Attach the lower back to the back waistband, press seam allowances towards the waistband and overlock.
- Attach the right front waistband to the upper right front, press seam allowances towards the waistband and overlock. Attach the lower right front to the right front waistband, press seam allowances towards the waistband and overlock. Process the left front similarly.
- Mark the buttonhole slit with three lines on the right front facing's right side: the first line is parallel to the edge and runs 1.5 cm from the finished edge; the second and third lines define the length of the buttonhole. Place the fused lining on the right side of the front facing, face down, moving away from the edge, aligning the lining's cut edge with the marked line. Stitch 0.5 cm from the marked line along the buttonhole slit up to the lines defining its length. Place the second buttonhole lining flush with the first lining's stitching line and stitch 0.5 cm away. Check the correctness of the lining attachment from the wrong side (stitches should be parallel). Cut the opening. Make diagonal cuts 1-1.5 cm from the end of the buttonhole slit. Turn the linings through the opening to the wrong side, forming a frame from the fused lining equal to the width between the stitches. Stitch a securing line into the lining attachment seam. Press the second lining towards the inner edge of the front facing and stitch a securing line 0.1 cm from the lining attachment seam. Mark and make buttonholes. Buttonholes are made on the front facing together with the fused lining. Straighten and secure the ends of the buttonhole from the wrong side with a double backstitch at the base of the corners. Stitch the lining edges. Place bar tacks between each pair of buttonholes, the length of the bar tack equals the width of the frame. Press the front facing.
- Place the front facing on the right side of the front piece, face down, and stitch the edge. Trim seam allowances at corners, turn the front facing to the right side, press.
- Attach the right front neckline facing to the upper right back, press seam allowances towards the facing. Attach the left front neckline facing to the upper left front, press seam allowances towards the facing.
- Stitch shoulder and side seams, press seam allowances towards the back and overlock.
- Stitch shoulder seams of inner neckline facings, press seam allowances open. Fold facings with the dress right sides together and stitch the neckline edge. Clip seam allowances at curves, trim at corners. Turn pieces to the right side, straighten, press. Fold the allowance of the inner placket inwards and topstitch into the seam of the outer placket.
- Cut a bias strip 4 cm wide and a length equal to the armhole length + 4 cm. Fold the bias strip in half lengthwise, right side out, and press. Place the strip on the armhole edge from the right side, leaving tails, and stitch. Fold the strip to the wrong side, clip seams, and topstitch along the fold to the main piece. Press.
- Make buttonholes on the right front piece. Topstitch on the right front piece according to markings, securing the fly front closure. Sew buttons on the left front piece.