Military Style Jacket
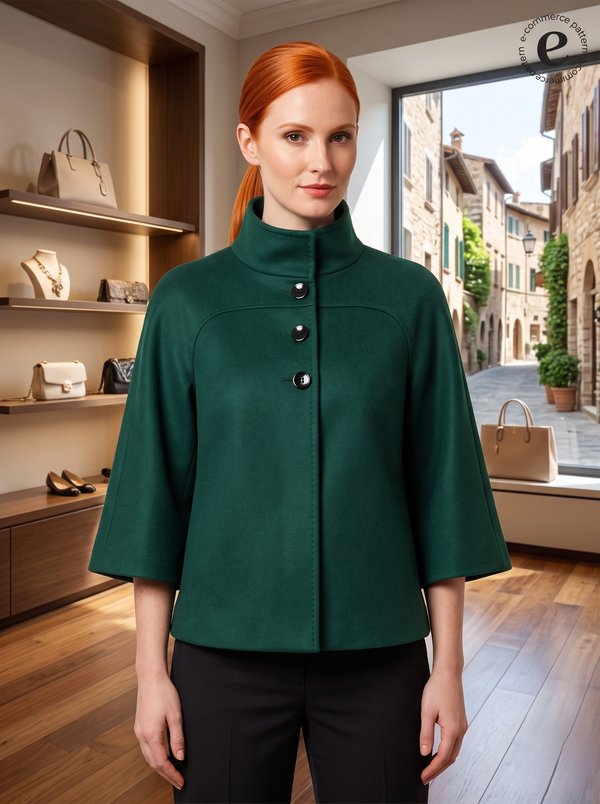
A women's fitted hip-length jacket with a high stand collar that buttons closed, a long single row of buttons down the front and rounded front corners at the hem. Princess seams with in-seam pockets, two-piece sleeves, fully lined.
When To Wear
- In autumn and spring as a short jacket over dresses, skirts or trousers.
- For the office, buttoned up to the collar.
Key Design Features
Silhouette: Fitted at the waist by princess seams and darts on the front and back.
Length: Hip length.
Collar: High stand collar in two layers, both interfaced, with a buttonhole on the stand.
Sleeves: Long two-piece set-in sleeves with shoulder pads and sleeve heads.
Front: Centre front panels fully interfaced; front darts cut open, pressed towards the centre and topstitched; front edges rounded at the hem.
Closure: Single-breasted, buttonholes on the right front and the stand collar, 11 buttons in total.
Pockets: In-seam pockets in the front princess seams, with lining pocket bags.
Back: Centre back seam, princess seams and back darts pressed towards the centre.
Finishing: Topstitching along the front edges, stand collar, jacket hem and sleeve hems; armhole edges reinforced with interfacing.
Lining: Full lining, bagged and turned through an opening in the right lining sleeve.
Level Of Difficulty
Intermediate. In-seam pockets in princess seams, a two-layer stand collar sewn in one seam with the front edges, two-piece sleeves with sleeve heads, a bagged lining.
Fabric Recommendations
Thin coating fabrics of natural or blended fibres.
Additional Supplies
- Lining fabric
- Fusible interfacing (front facings, back neck facing, stand collar, centre fronts, armhole edges, pocket openings)
- 11 buttons
- Shoulder pads
- Sleeve heads
Cutter's Must
If the patterns have a double contour, they include seam allowances. If the contour is single, the patterns do not include seam allowances. Seam allowances: all seams 1 cm. Hem allowance for the bottom of the garment and sleeve 4 cm. Attention! First of all, print out the paper patterns and lay them out on the fabric width (fabric width can be from 90 cm to 150 cm) to determine how much material you will need (don't forget to account for paired and symmetrical pieces).
- From main fabric:
- Center Back – 2 pieces
- Side Back – 2 pieces
- Side Front – 2 pieces
- Center Front – 2 pieces
- Center Front Facing – 2 pieces
- Stand Collar – 2 pieces
- Upper Sleeve – 2 pieces
- Lower Sleeve – 2 pieces
- Back Neckline Facing – 1 piece
- From lining fabric:
- Side Back – 2 pieces
- Side Front – 2 pieces
- Upper Sleeve – 2 pieces
- Lower Sleeve – 2 pieces
- Center Back – 2 pieces
- Center Front – 2 pieces
- Pocket Bag – 4 pieces
- From fusible interfacing:
- Center Front Facing – 2 pieces
- Back Neckline Facing – 1 piece
- Stand Collar – 2 pieces
- Center Front – 2 pieces
- Strips to reinforce the armhole edges and the pocket openings (cut by measurement)
Attention: the Center Front and Center Back lining pieces are cut from the main fabric patterns, minus the width of the Center Front Facing and Back Neckline Facing respectively.
Sewing Instructions
When stitching pieces, pay attention to the notches - they must match!
- Fuse interfacing to the Center Front Facings, Back Neckline Facing, Stand Collar and Center Front pieces, and along the armhole edges of the front and back. Reinforce the pocket area on the Center Front and Side Front pieces.
- Mark the darts on the front and back. Stitch the back darts and press them towards the center. Stitch the front darts, cut the dart open along the fold, press it towards the center of the piece and topstitch.
- Stitch the back princess seams (Center Back to Side Back) and press open. Stitch the center back seam and press open.
- Place the Pocket Bags on the right side of the Side Front and Center Front pieces. Stitch each pocket bag to the pocket opening allowance. Fold the Side Front seam allowance back and topstitch it onto the pocket bag.
- Stitch the front princess seams together with the pocket bags. Clip the allowance at the beginning and end of the pocket opening, press the allowances open, pressing the pocket at the same time.
- Stitch the shoulder and side seams and press open.
- Stitch the Back Neckline Facing to the Center Front Facings, press allowances open.
- Stitch the outer Stand Collar to the jacket neckline and the inner Stand Collar to the neckline of the facings. Clip the allowances at the curves and press open. Place the facings on the jacket right sides together and stitch the front edges and the stand collar in one seam. Trim the corners, clip the curves, turn right side out and press. Press up the hem of the jacket.
- Stitch the back (elbow) seam of the sleeve (Upper Sleeve to Lower Sleeve) and press open. Press up the sleeve hem. Stitch the front sleeve seam and press open.
- Set the sleeves into the armholes, matching the notches. Insert the shoulder pads and sleeve heads.
- Stitch the seams of the lining and set in the lining sleeves, leaving an opening in the front seam of the right lining sleeve.
- Stitch the lining to the inner edges of the facings. Tack the allowances of the stand collar seams together close to the seams.
- Stitch the lining to the jacket hem and the sleeve hems. Turn the jacket right side out through the opening in the sleeve lining and close the opening.
- Topstitch along the front edges, stand collar, jacket hem and sleeve hems.
- Work buttonholes on the right front and the Stand Collar. Sew the buttons on the left front to match.